Creating mosaics made of LEGO is a popular activity and you may enjoy looking at some examples at Mosaic Blocks or at the Flickr LEGO Mosaic Group. I started out with absolutely no LEGO mosaic experience and I wrote this tutorial along my way towards my first mosaic. I hope that the lessons I learned may also help you creating your own mosaics.
1. Selection of a source image and basic dimensions of the mosaic
Selecting your source image does seem like an easy task, but you need to be aware of some of the constraints to make a good choice. First, you should have as little detail in the photograph as necessary. You will be heavily limited on the resolution of the mosaic. The smallest unit of a LEGO mosaic is a single 1×1 plate that measures 8×8 mm (actually 7.8mm plus 0.1mm of play between bricks). This results in a resolution of 3.175 dots per inch (DPI) or 1.25 dots per centimeter. Maybe it would be wiser to refer to this as 3.175 bricks per inch (BPI) or 1.25 bricks per cm. A large base plate is 48×48 studs, resulting in 38.2 x 38.2 cm dimension (0.8*48-0.2). Photographs often use the proportion of 2:3 and hence a 2×3 base plate design would result in 96×144 bricks or 76.4 x 114.6 cm.
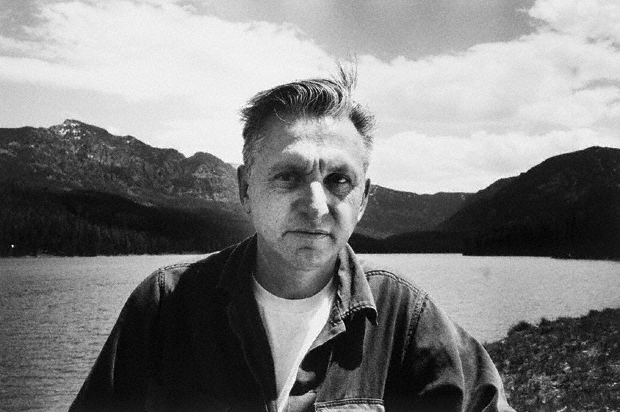
For my mosaic I selected a portrait of Robert M. Pirsig, one of my personal heroes. The source image is a grey scale image, but creating colorful mosaics follows the same process as a grey scale mosaic.
2. Preparing the source image
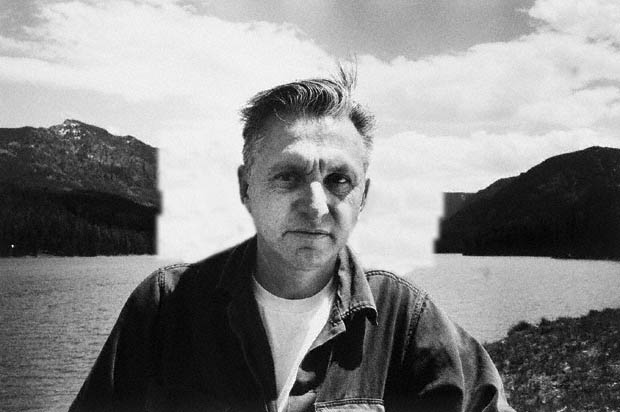
The image is 620 x 412 pixels and hence far too big for a mosaic. One pixel in the image will correspond to one brick and hence we need to crop the image to 96×144 pixels. But before we crop the image, it is a good idea to get rid of any unnecessary elements in the background. I used Photoshop to remove the background around his head.
Your could now already use a dedicated LEGO Mosaic software to such a Photobricks or PicToBrick to create your mosaic. The cropping, sizing and selection of colors can be done by them semi-automatically. Here is what it would look like directly:

I prefer to stay with Photoshop just a little bit longer to work out some of the details of the photograph. Bear with me for the next steps. The next step is to use the crop tool so bring the image to the desired size. My monitor has a resolution of around 108 PPI and hence the photograph becomes very small at 100% magnification:

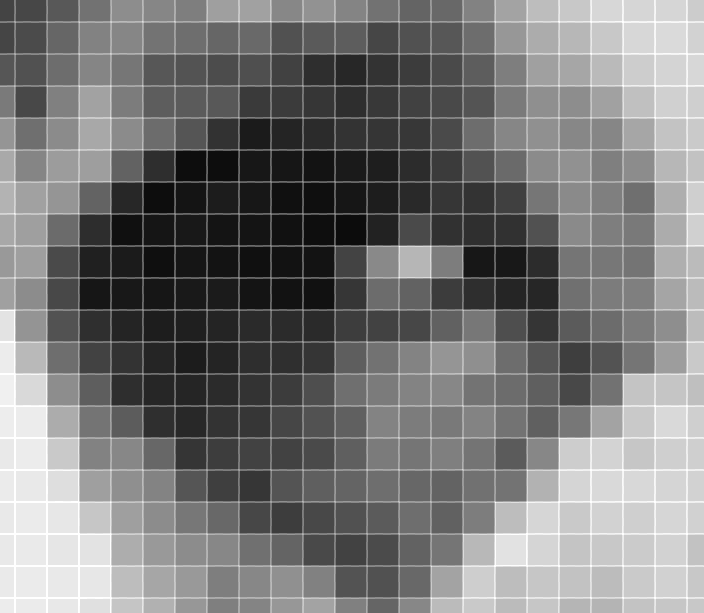
To get a better impression of how the mosaic may look in the end I magnified the image until one pixel is approximately 8mm and I took a screenshot of it (see below). Both images will have different sizes on your monitor, since your are likely to have another screen resolution. Please notice the important difference between screen resolution, which is a dimension of density (measured in PPD or DPI) and the number of pixels on your screen (such as 1028×768 pixels).
3. Reducing the colors
There are several methods you can use to reduce the number of colors in your photograph to the colors available in LEGO. You could use a dedicated software, such as Triadem Coloration but it is rather pricy. One of the easiest is to change the mode of the image to Indexed Colors and using a custom lego color palette:
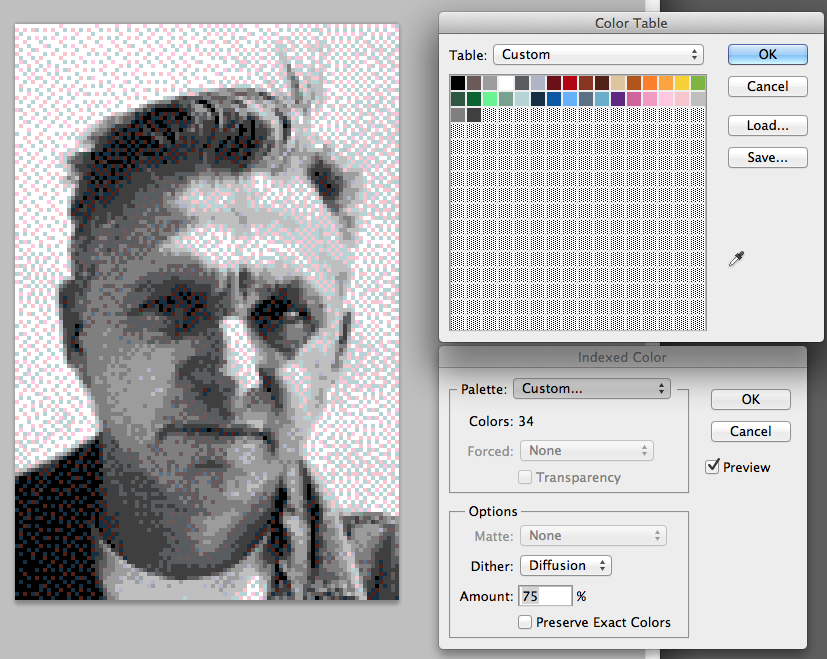
Your can use different dithering methods to get desired look. The disadvantage is that this a very directional approach. Every time you want to make changes to the image, you need to change the mode again. For the purpose of a gray scale image, it is also necessary to remove the color swatches in the palette to get get rid of any colorful noise.
A more interactive approach is to use an adjustment layer to simulate the indexed color mode. This way you can continue working and adjusting the image and immediately see the results in a limited color space. Photoshop does not yet offer a direct way to do this, so we need to work around the problem. The best options currently is to add Posterize adjustment layer and limit the number of colors to a set number. This set of colors will not be actual LEGO colors, but it will be the best suitable number of limited colors. This is good enough for most purposes. However, it does not allow you to “colorize” you gray scale image. It can be nice to add just one color to you gray scale image, such as a muted blue to give it more of a “noir” feeling. With Posterize you will only get a limited number of colors that are true to its source. A much better way would be to use the Color Lookup adjustment layer introduced in CS6. It could match each color in the image to a LEGO palette. Unfortunately, there is no easy way to create the necessary 3DLUT (3 dimensional look up table). Any volunteers to hack this together?
One problem with creating any kind of color reduced image that the LEGO color palette is a moving target. LEGO frequently introduces new colors and discontinues others. For a gray scale image, for example, it is important to notice that LEGO started to discontinue its gray and dark grey colors in favor for its more blueish counterparts in 2003. The new colors are called stone gray and dark stone gray. There is also an issue with the terminology. LEGO published their official color guide in 2010 and it was worked out into a nice table by the community. Trouble is that LEGO did not only replace colors, as described above, but the community also introduced its own terms. dark stone gray is also known as dark blueish gray on bricklink’s color guide.
Coming back to Photoshop, here is the image with the Posterize adjustment layer set to four:

You can see that the cheeks and the right side of the forehead is not yet optimal. The trick is now to add more adjustment layers, such as Brightness and Contrast. You can reduce the dynamic range of the image interactively and immediately see the result in the reduced color space. Another good trick is to use the Burn and Dodge tool to selectively darken or lighten the image.
The result of this process is visible below. The main improvement is that the background is all white and the face will mainly be gray.

4. Getting the parts list
The next step is to use a software, such as Photobrick, to get to a parts list. I imported the image and Photobrick and it provides me with a fully brickified version (see below). This mosaic looks much better compared to the earlier version above. Some last minute optimizations are still possible by painting individual bricks in the color desired. It is important to notice that Photobrick only uses the standard colors that are currently in production. It does not include all the uncommon colors that have been phased out, such as very light gray 1×1 plate. The part list can be exported as standard CSV or TXT, but also Bricklink XML. The later is important if you want to order the bricks form Bricklink instead of, for example, a LUG bulk order.

5. Building it
After receiving all the ordered parts it is time to build. Photobricks has a great feature that allows you to hover over every stud and it shows you the plate that needs to placed (see below). I only wished it had a printing options with all the edges of all the plates highlighted. That would be much easier than using you mouse to select all the pieces.

It will take me some time to order all the bricks, so I will update you once I have assembled the mosaic.
Really great tips! I’m not a photoshop pro, but was able to follow along the instructions here and greatly improved the base image. Are you still planning to publish part 2?
I am working on part two right now.
Awesome, looking forward!