
Harry Davis and me built a cable to connect a LEGO Power Functions (PF) motor to a Mindstorms EV3. The goal is to enable the EV3 to control PF motors. In particular I wanted to control a RC train motor through an EV3.
LEGO produced a cable (8528) to connect old motors (RCX) to the NXT, but it is no longer in production. You can still get them through Bricklink, but it will cost you dearly. You still need a PF extension cable to convert the old motor plug (RCX) to the current PF plug.
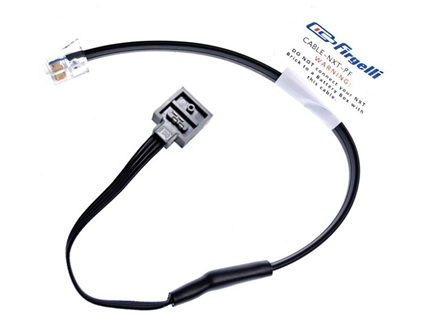
Firgelli produced a cable that allowed you to connect an modern PF to NXT directly, but it is also no longer in production.
There are two more solutions but both are more complex and costly. First, you can use the PF Mate from Mindsensors (currenlty $35). It sends IR signals to the IR PF receiver and thereby allows you to control motors even at a distance. The second option is the GlideWheel PF (currently $38) that directly connects a PF motor to the EV3. It also features a rotation sensor so that you can control the PF just like you would control a Mindstorms encoded motor. Both of these solutions offer a great functionality but they are also expensive, in particular since the components necessary for a custom made cable only costs a few cents.
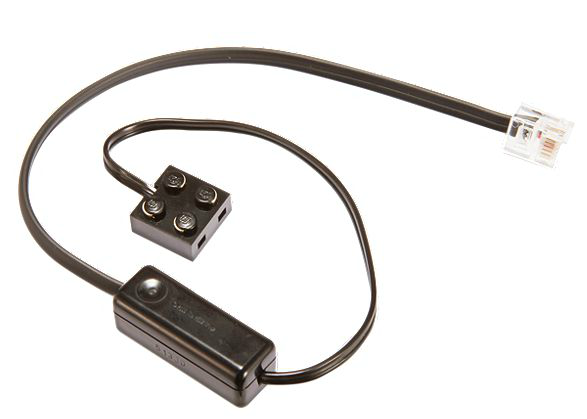
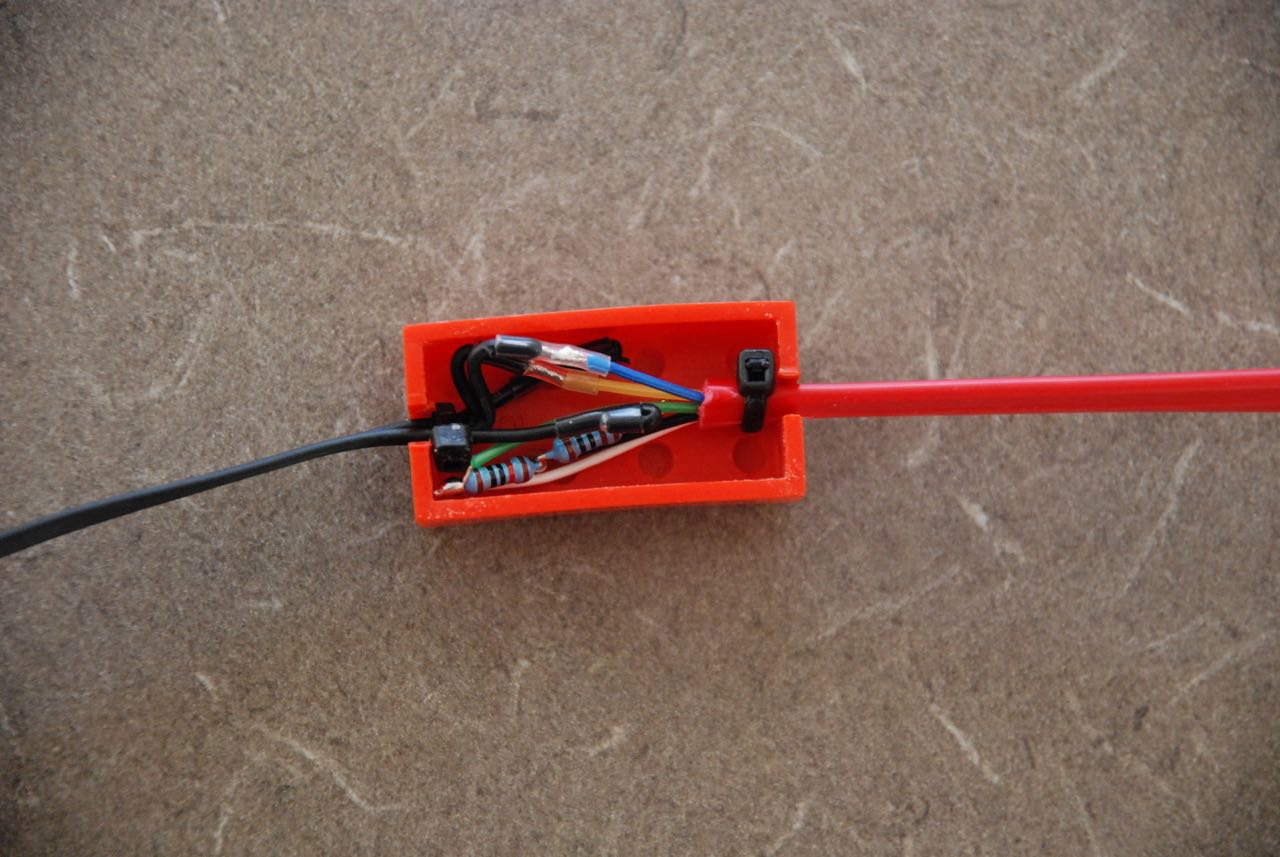
At Amazon you can get a book Make: Lego and Arduino Projects: Projects for extending MINDSTORMS NXT with open-source electronics that will show you how to do such projects, but for now it is time to pull up our sleeves and do it ourselves. TechnicRobot already showed that it can be done but detailed instructions were not yet available. We also built a casing for our cable so that it can be easily integrated into your model. Here is the final result:

And here is a video that shows our solution at work:
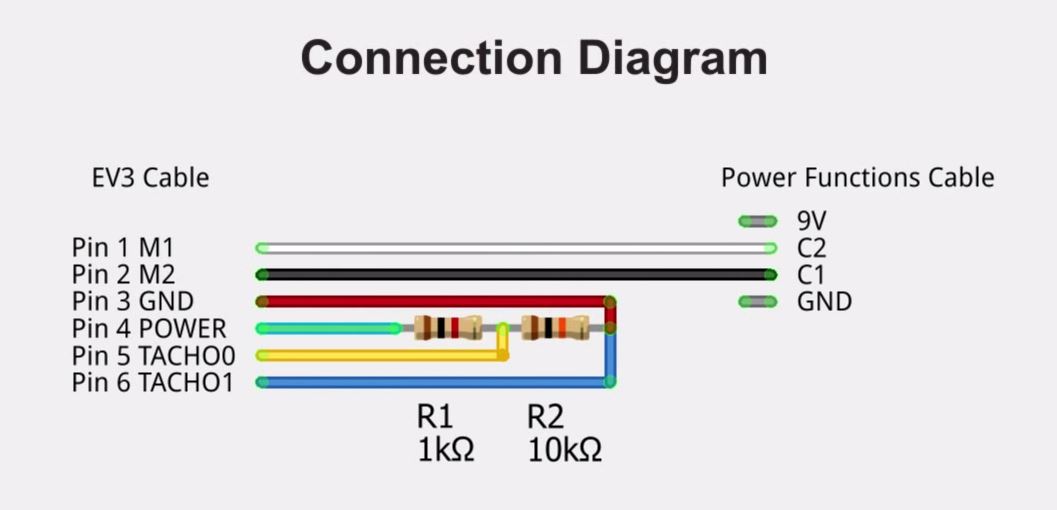
First, you need to have a look at the wiring diagram. You will need one 1k Ohm resistor and one 10k Ohm resistor. These will only cost a few cents in your local electronics store.
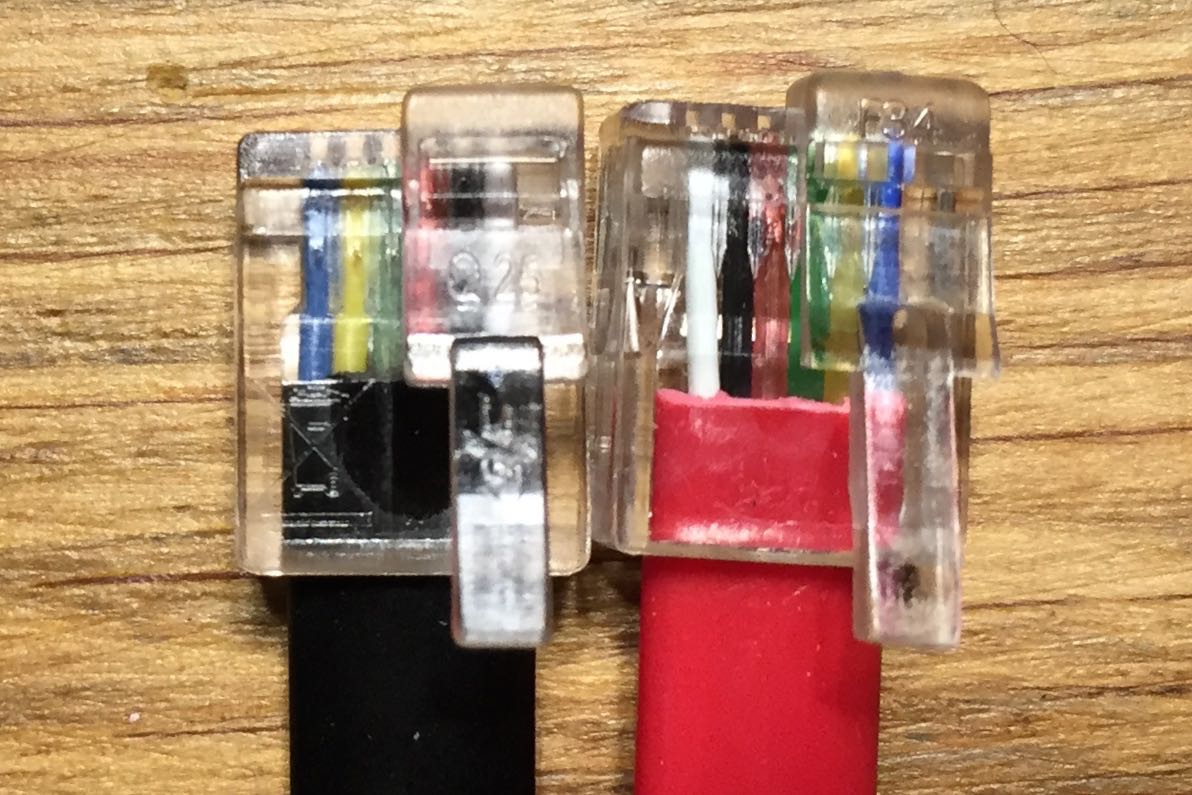
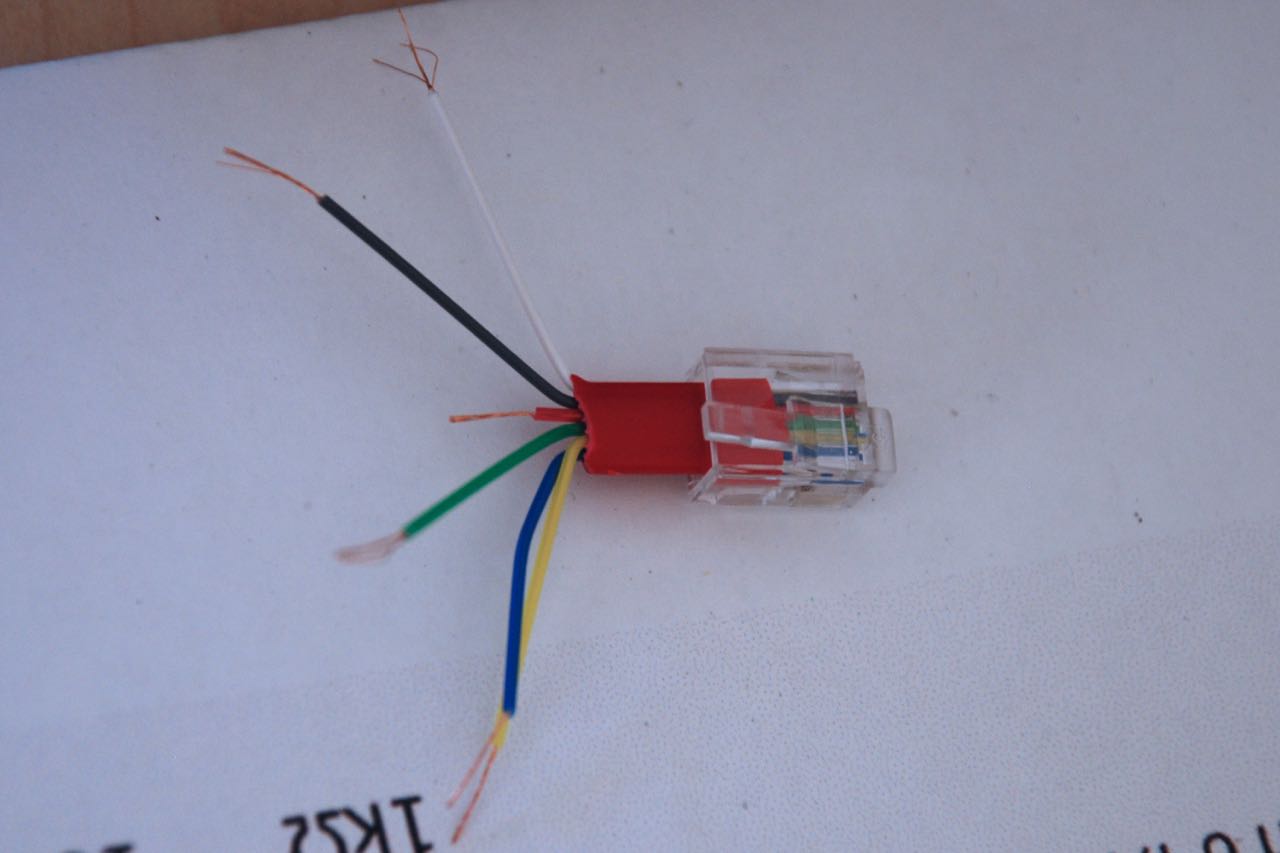
Next, you need to have PF cable and an EV3/NXT cable. As for latter, you need to pay extra attention to the sequence of colors on the cables. They differ across brands. On the left you see an original LEGO cable with the sequence blue, yellow, green, red, black and white. The cable on the right has the opposite order. The wiring diagram above uses the original LEGO coloring. In this tutorial I will use a third party cable and the coloring is reversed. I will therefore refer to the pin number and not the color in the following steps.
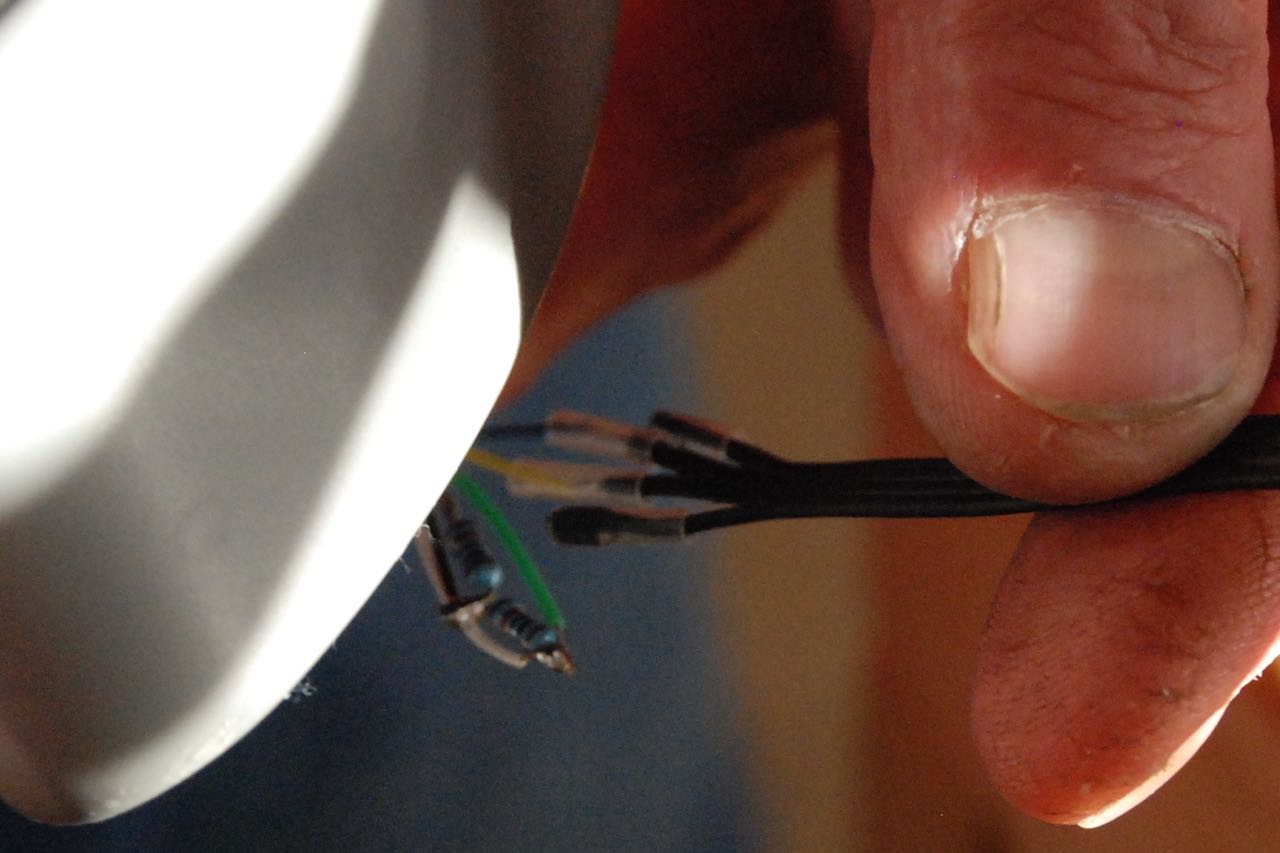
The next step is to cut the EV3/NXT cable and free the inner cables.

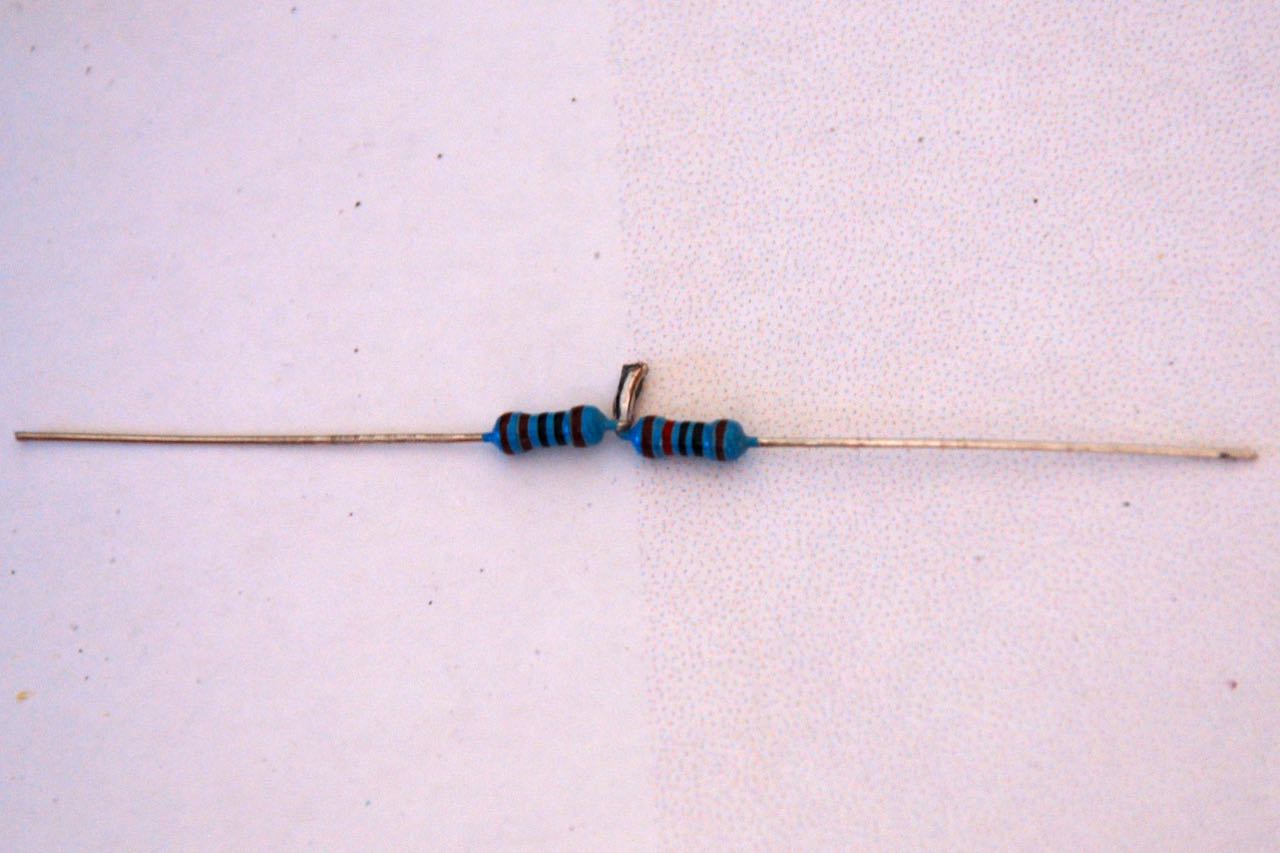
Then you twist the two resistors legs and solder them together.
Then you need to cut the pin 4 cable shorter.
Solder the resistors to the pin 4 cable.
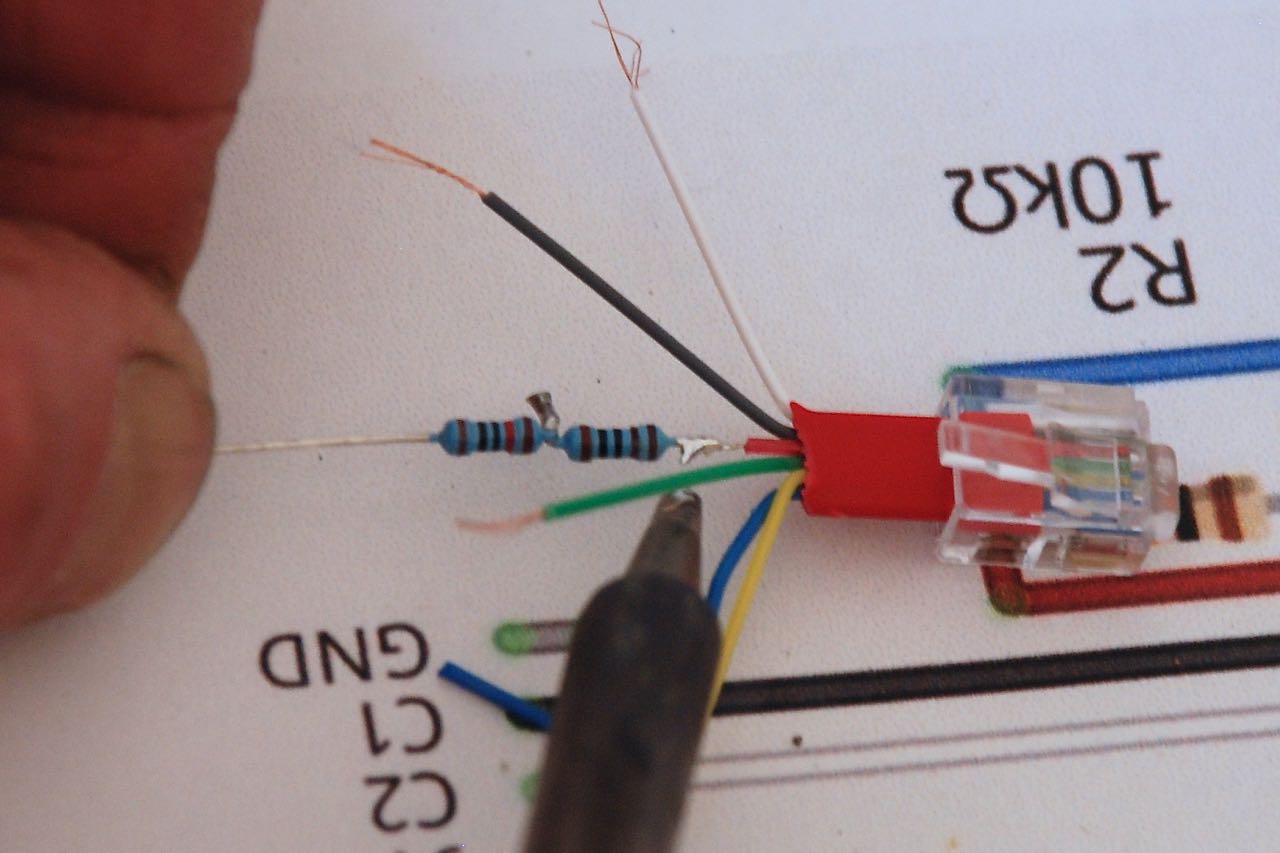
You can then twist the pin 2 cable onto the resistors.
Next you solder the cable to the resistors.
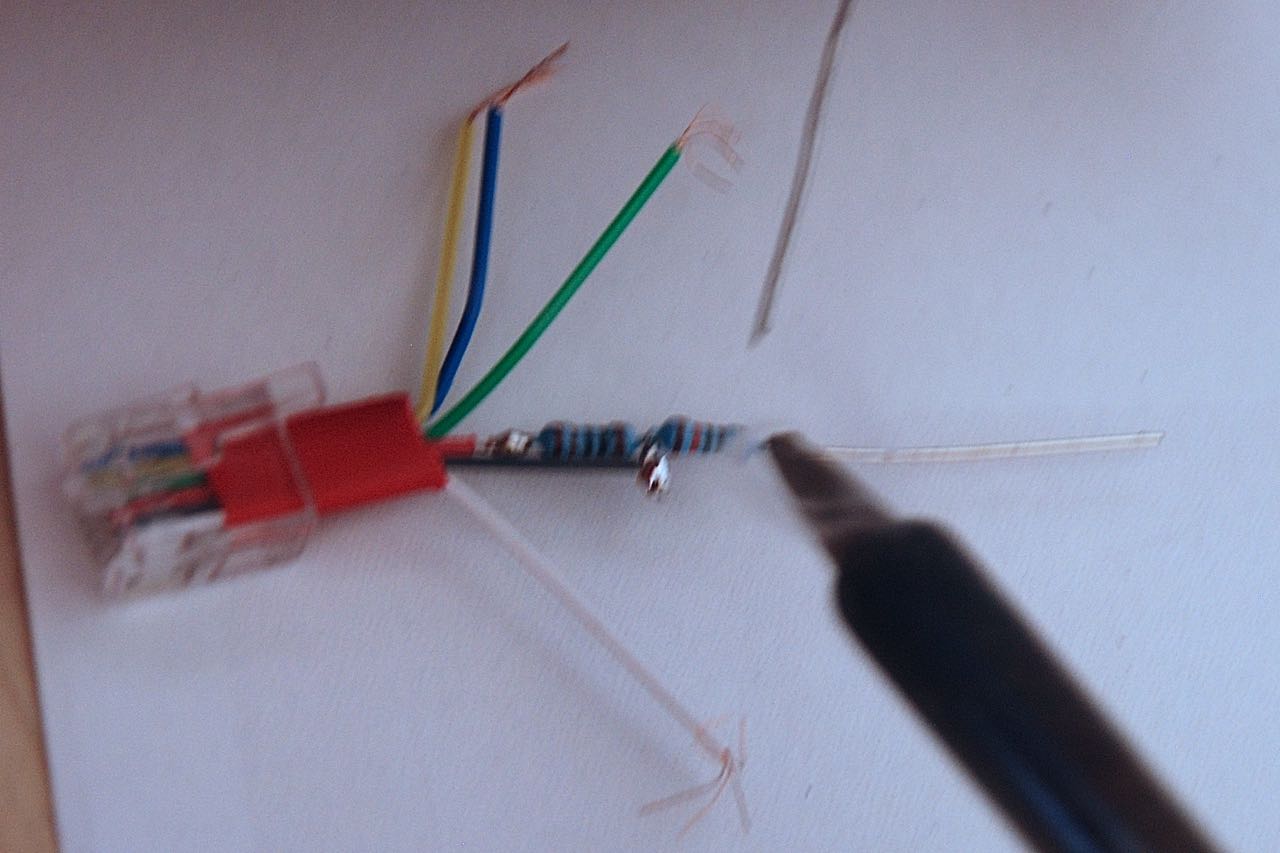
Next you twist the pin 3 and 6 to the end of the resistors and solder them on.

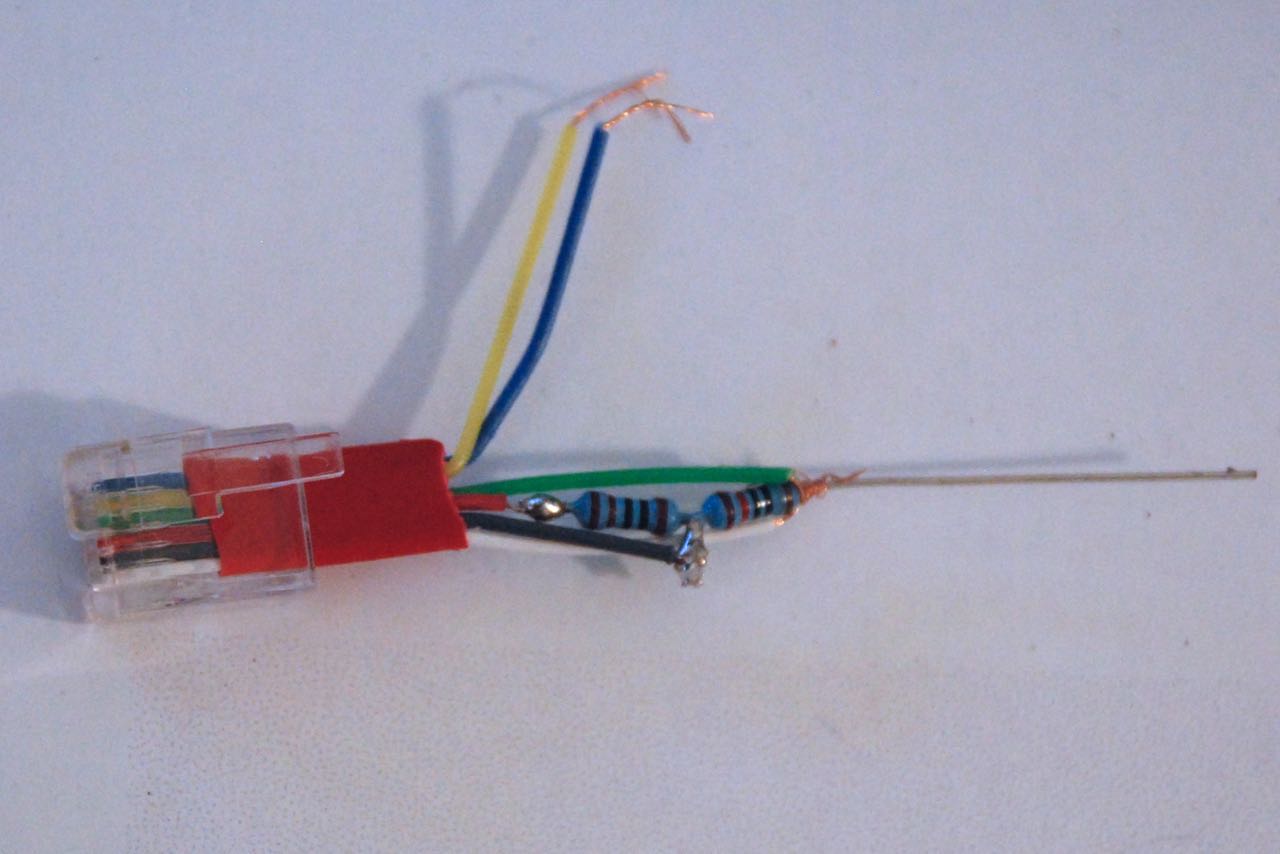
Now you need to put the heat shrinking tubing over the pin 1 and 2 before soldering the pins to the PF cable.
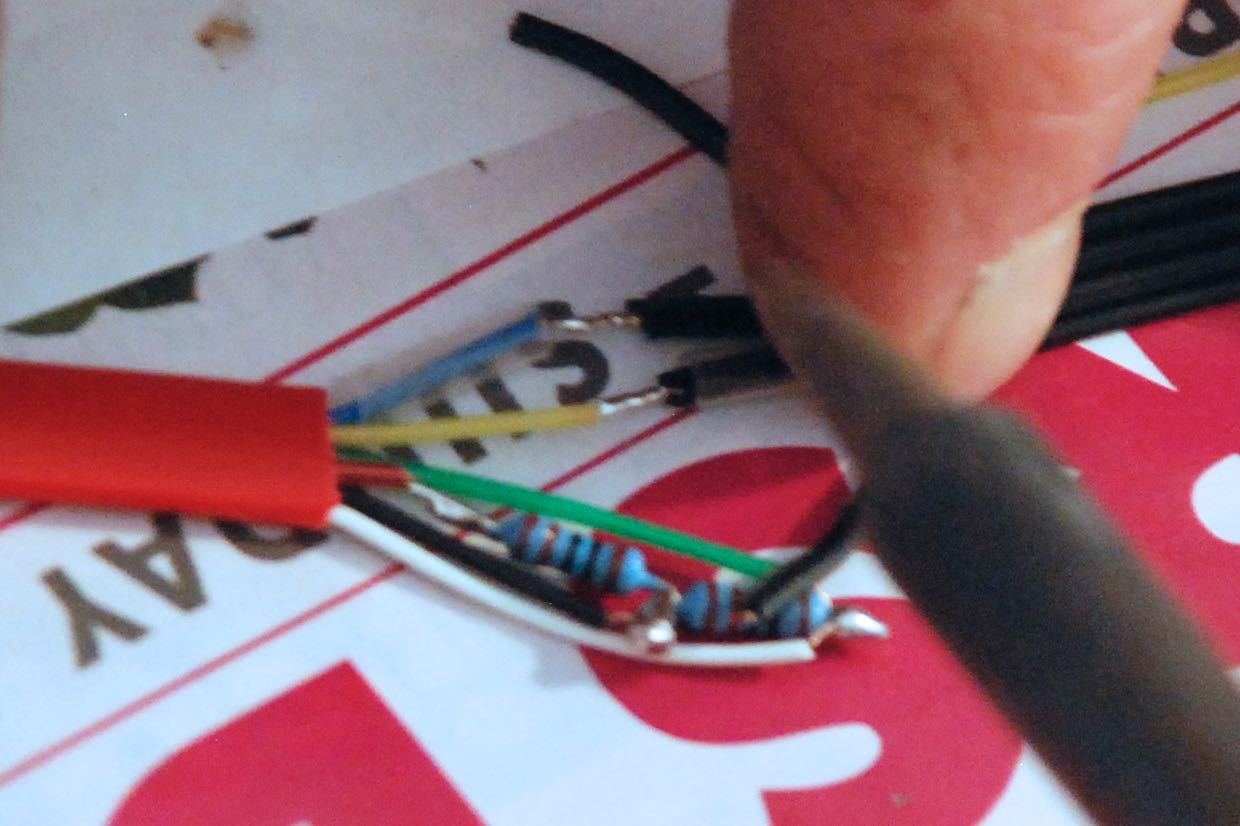
Use a hot air gun or a similar device to shrink the tubes. You can also use the tubes to insulate the ends of the two not used PF cables.
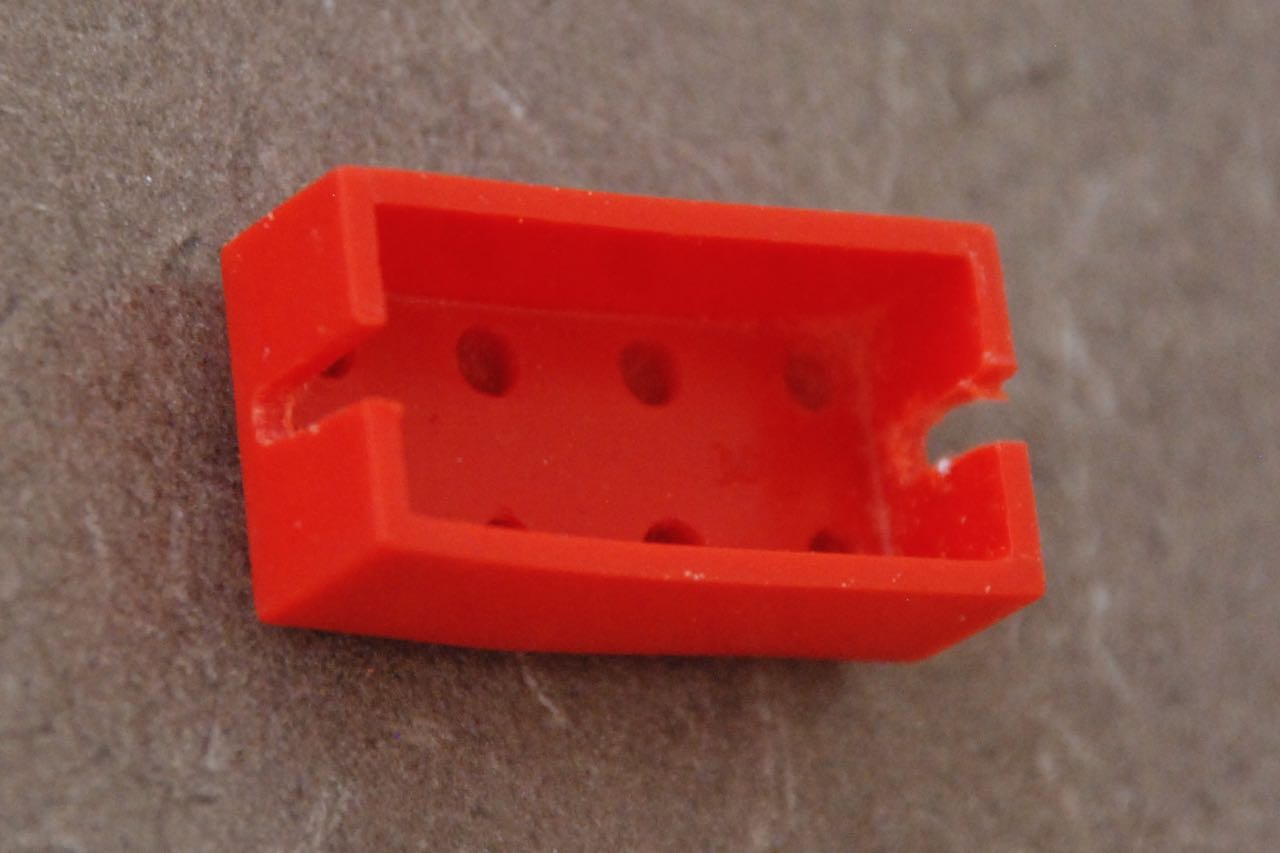
Now it is time to build the casing. We used a very old 2×4 brick since it did not have any inner pins. I cut out two openings on the sides for the cables.
To prevent the cables from being pulled out of the casing you need to attache cable ties to the two ends.
Now you are ready to test the cable. Connect it to an EV3 and use the Port View to check if the motor is detected correctly. If you made a mistake in the wiring it will show “Port Error”.

Could you tell me if it is possible to run 2 motors XL on the same port. The power there will not be too high for the port ?
It depends on the load. If the two XL motors run without any resistance then this will work.
hi, can i know why must connect the resistors? if didn’t connect the resistors, will it cos any problem to the EV3 or the motor ? tq.
My understanding is that the resistors help the EV3 to identify the motor.
Hi, thanks for sharing how to build the ev3-pf cable. May be the step “You can then twist the pin 2 cable onto the resistors.” might be wrong. Shouldn’t it be pin 5 instead pin?
Thank you for this explanation which is very clear regarding how to make the cable. However, it doesn’t really explains how it works :
– how does the EV3 brick detects and identifies the presence of the new device ?
– how does the EV3 brick controls the motor (e.g. DC voltage ?)
For me, I think that it would be clearer if the wiring diagram would reuse the naming convention of the book “Hacking your Lego Mindstorm EV3 Kit”
– Tacho 0 and 1 correspond to Clock and Data signals of the I2C bus
– M1 and M2 correspond to Analog and Ground
A possible explanation of the functioning (tbc) is then that :
– Clock and Data signal on the I2C bus are pulled to high level
(http://www.ev3dev.org/docs/sensors/i2c-sensor-addressing/) so that the EV3 believes there is a device at address 7F
– Analog output is used to control the voltage transmitted to the device
I want to build a baja truck and was wondering if one cable could power 2 xl motors, I want to use 4 in total to drive the wheels, but I don’t want to buy a multiplexer because it costs $50 and it needs an external power supply
I have not tested this so I cannot give you a good answer. The EV3 can run four motors simultaneously, so there might be enough power.
Is the step “You can then twist the pin 2 cable onto the resistors.” wrong? Shouldn’t it be pin 5 instead pin? Also can you be more specific on the PF cable side of it?
First, using the PF extension cable has two different ends, which one do I use?
Second, can you draw out from left to right or top to bottom which side is power on the PF cable so I have a reference point?
Third, Do I connect power from PF cable to the pin 3-4-6 junction? If so where do i connect the ground from the PF cable?
I look forward to your response. Thank you.
Please look at this youtube video as it shows more specifically what I’m asking in the previous comment.
How to use RC LiPo’s to power Lego Technic
https://www.youtube.com/watch?v=Hr8ZOnIzlVE
can somebody tell me where i can buy only the cable connectors for nxt or ev3
You can try to buy a used cable from Bricklink. Or build your own with the instructions provided. It is rather simple.
The connection diagram captured from this video
https://www.youtube.com/watch?v=Ns3TODgRlCE
Can you use this cable to run an EV3 motor through the power functions infrared sensor?
I would doubt it.
Hallo,
Ein Adspter für Power Up bzw. Y Stecker
Great work :)
Do you know if the PF motor can than be controlled the same way as EV3 motor? i mean for degree of rotation, speed etc when it is connected using this newly made cable to EV3 ? Thanks for replying
No. The PF Motors do not have an encoder. Hence they do not know about their rotation position. You can only control the power and duration.
If I put the PF end onto a PF receiver and then connect the NXT motor to it’s cable end, will the motor react to the receivers’ input?
EV3 LEGO 99455 Motor, 6 PIN connector.
What power supply for this motor ?
What power cable from battery box (4 PIN) to EV3 motor (6PIN) ?
Thanks for this post!!! I would like to connect a PF motor to the NXT or EV3 directly. I’m assuming that an NXT recognizes a motor attatched to the 9V end of the cable. I have about 20 of the NXT to RCX adapter cables made by LEGO. Can those 9V cable ends be swithed out for PF cable ends and still work properly?
I would assume that this is possible. Try one and see if it works and please do report back on your success.