
Using mouse, keyboard, joysticks and other input devices in your Java software is much easier using JInput. Unfortunately, the documentation on how to install and setup the software is short and difficult to follow. I was struggling for days getting it to work with Eclipse on Mac OS X 10.12.6. My first approach was to use Maven to install JInput. The excellent M2Eclipse plugin provides good support for Maven. Unfortunately, the pre-configured Maven Repository does not include JInput. I was unable to configure Maven/Eclipse to connect to The Central Repository to download JInput from there. Okay, I am not a fulltime Jave programmer and maybe it would become clear to me eventually. In the meantime I got it to work manually. I hope that this tutorial will help you in your project. I used Mac OS X and I cannot guarantee it will work on any other platform.
1. Download JInput
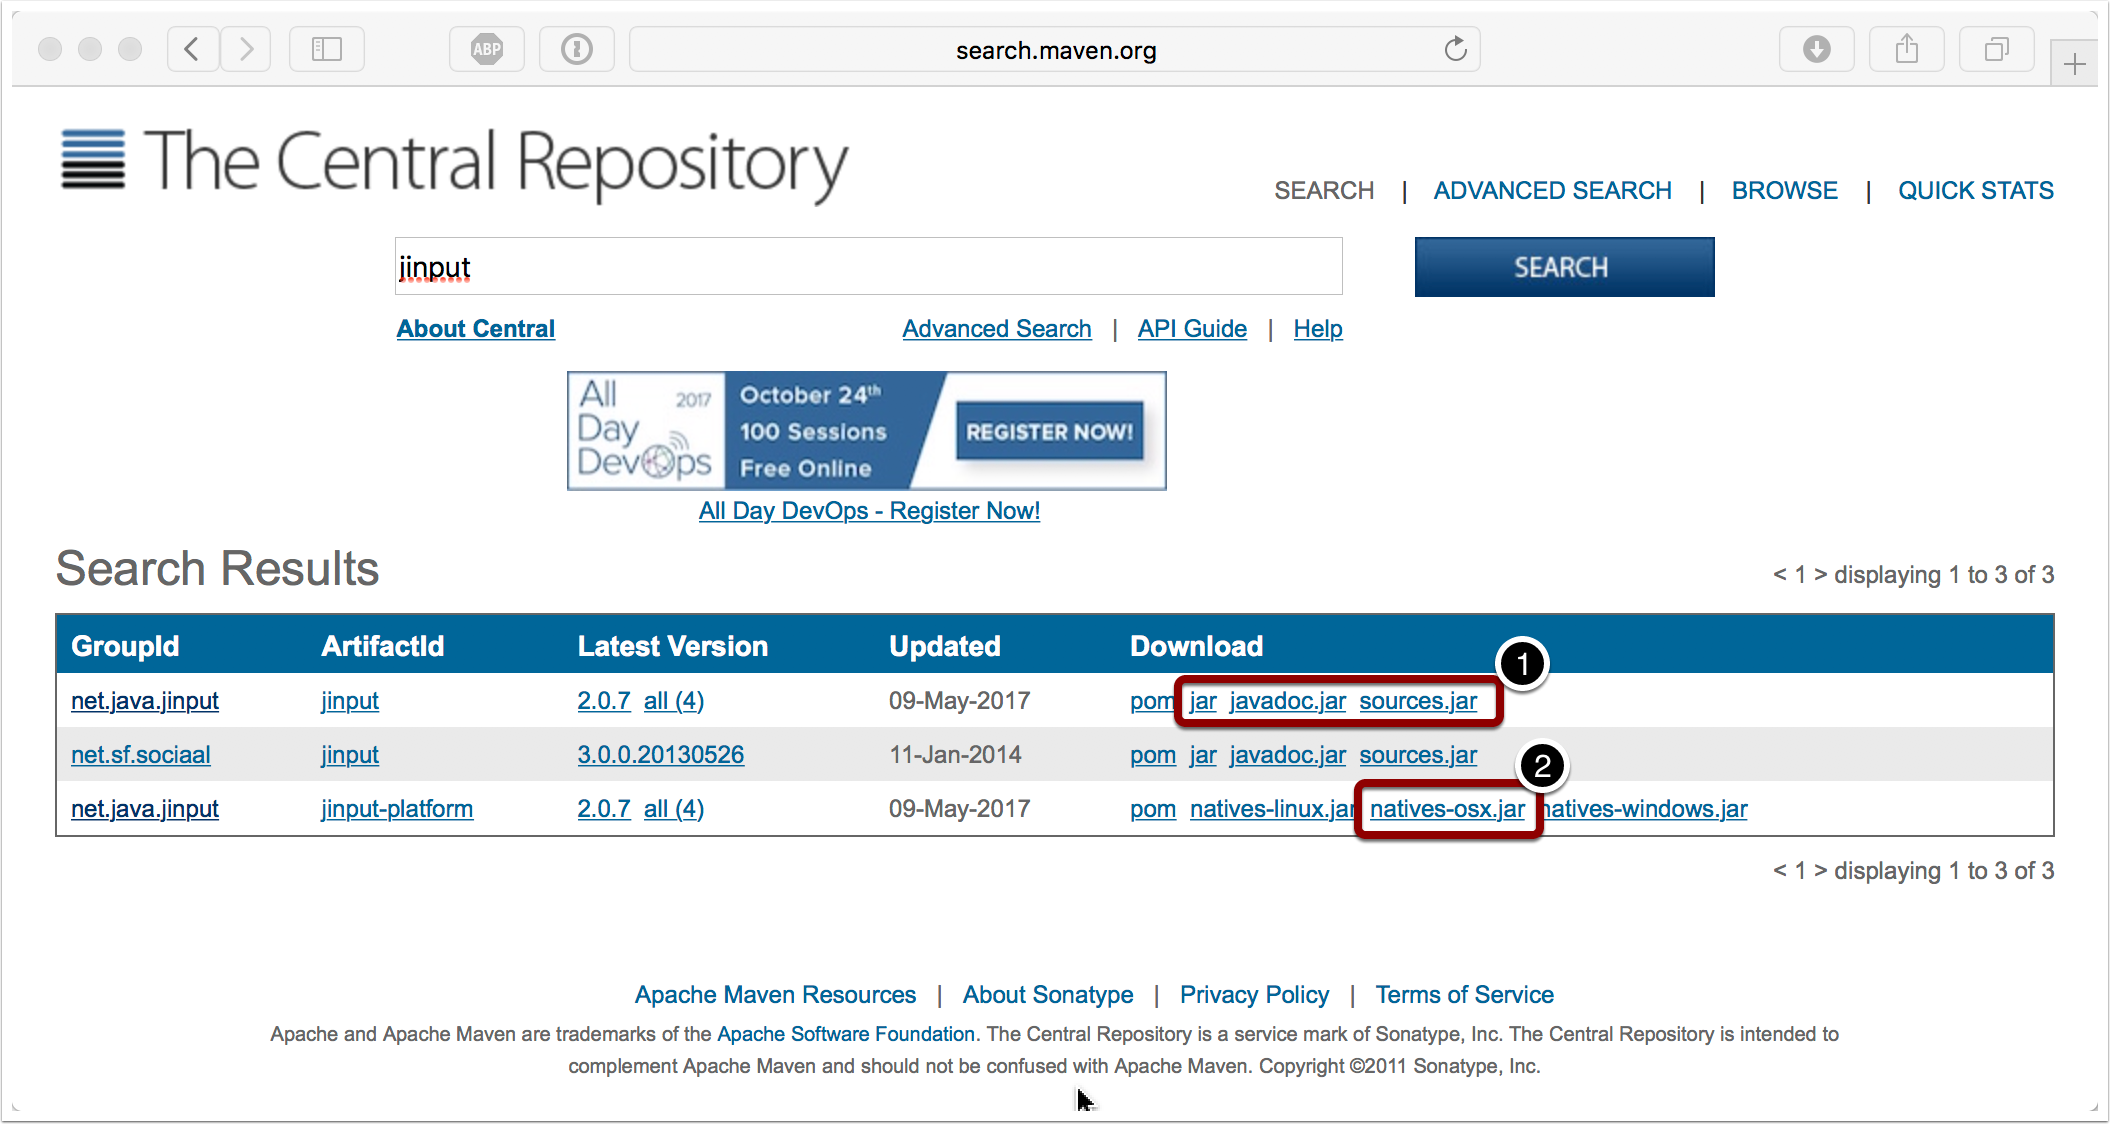
Visit The Central Repository and search for JInput. I used version 2.0.7. Download jinput and jinput-platform. You will need all the JAR files for jinput and the natives-osx.jar file from jinput-platform.
2. Download JUtils
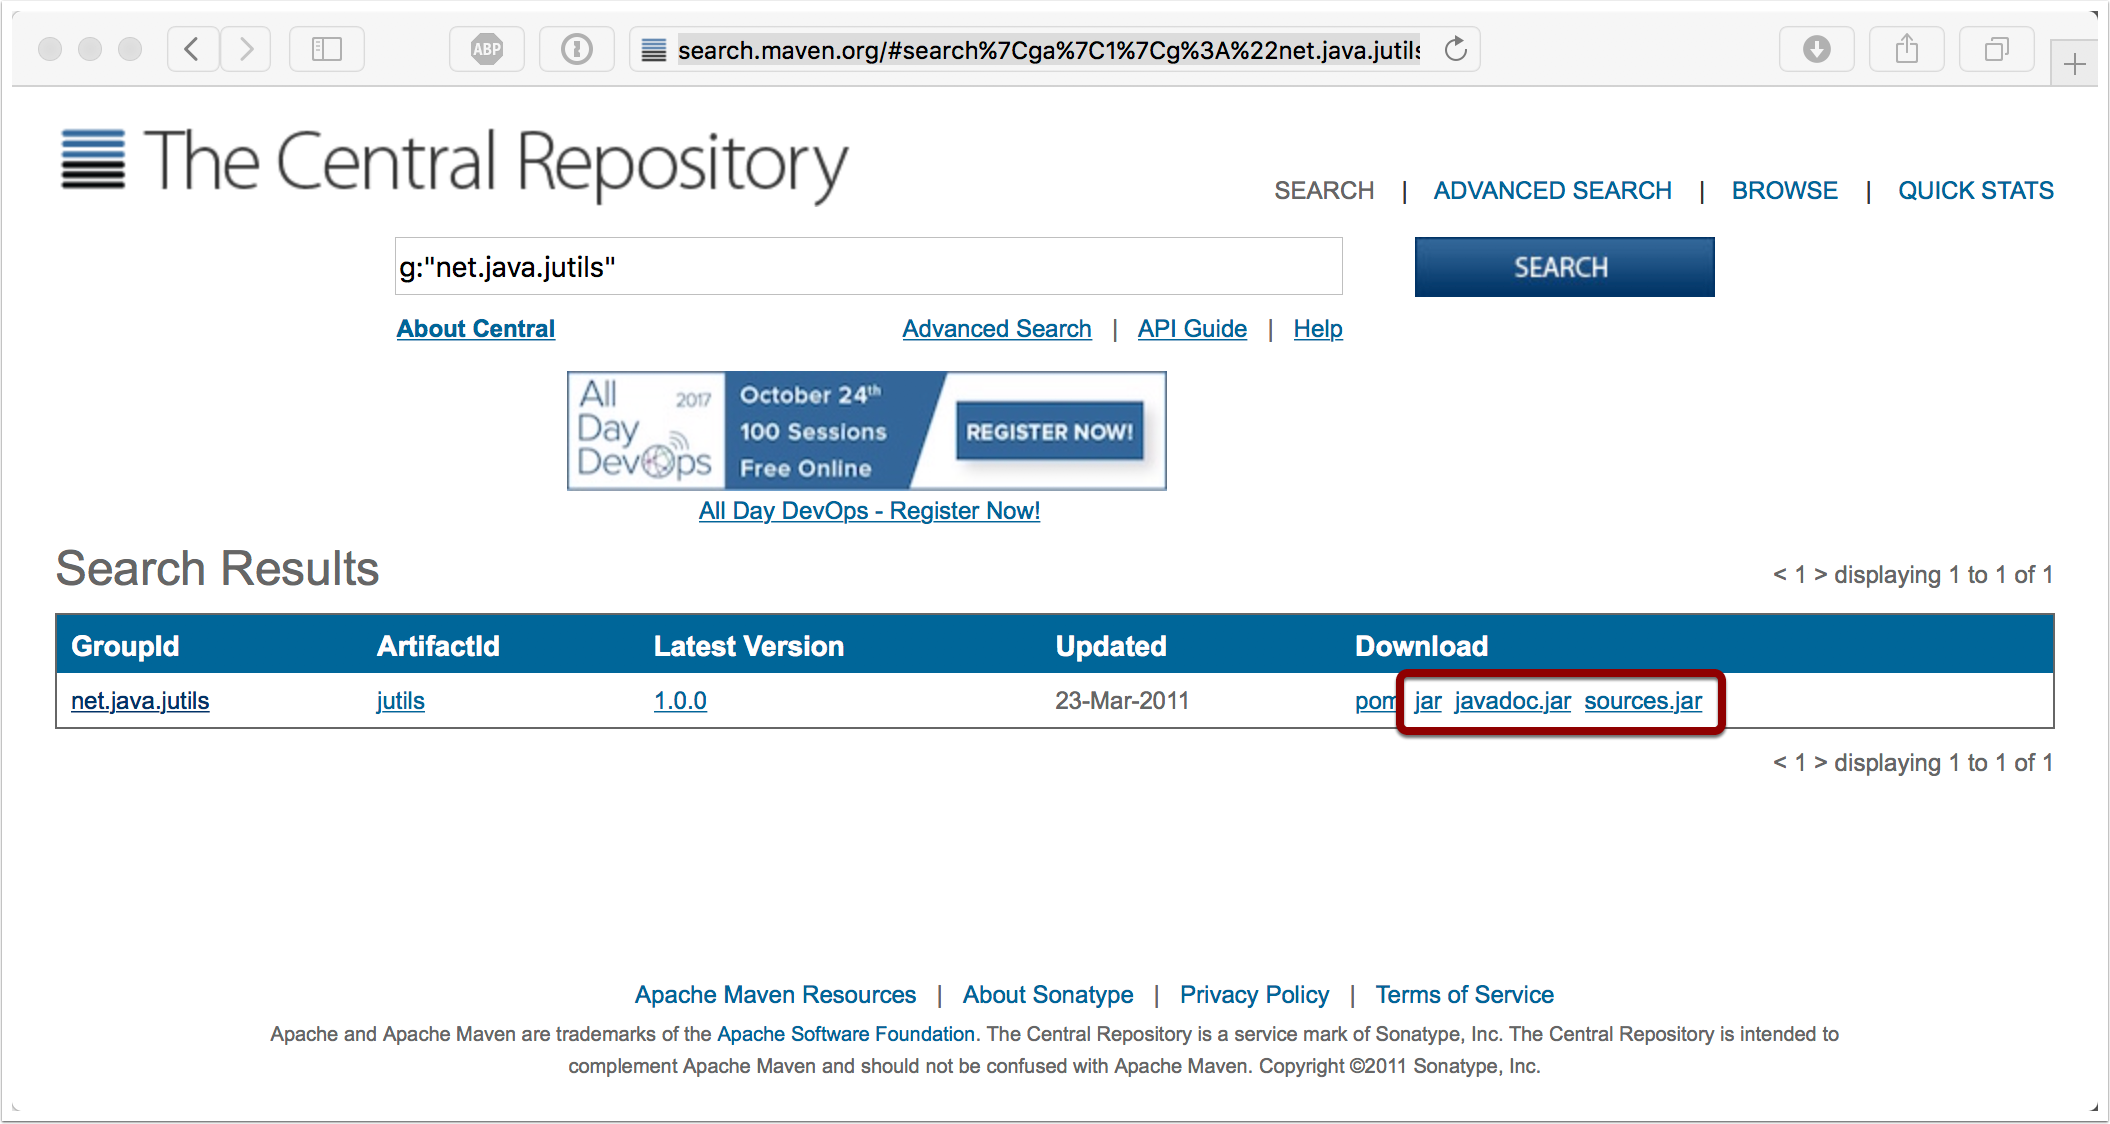
JInput uses another Java library called JUtils which is available from The Central Repository. You need all JAR files.
3. Move the files into a convenient location
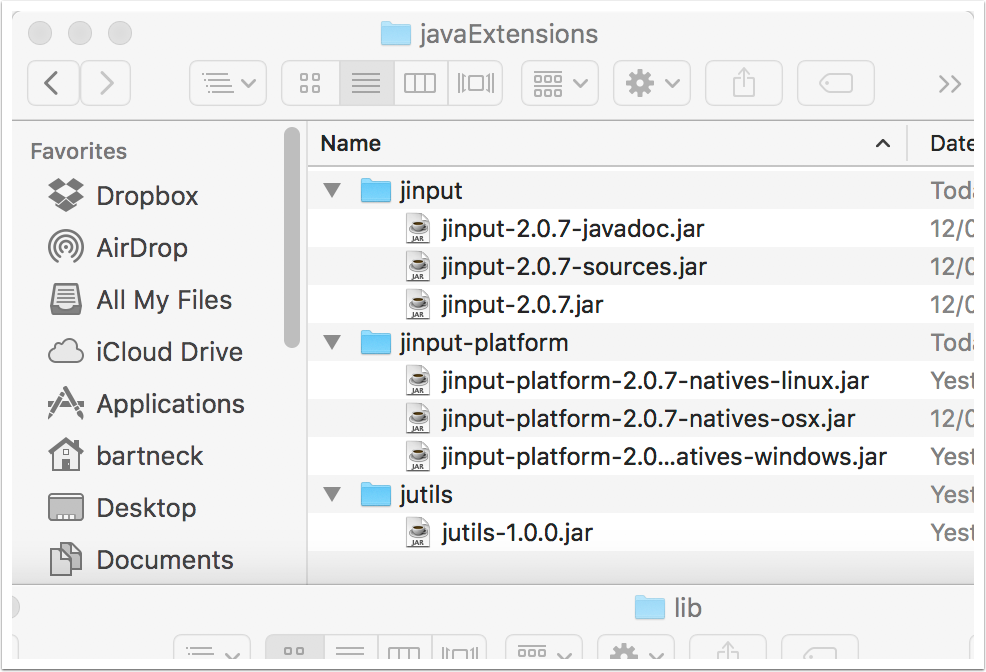
I moved all the files into a folder in my Documents directory. This will make it easier to find the files later.
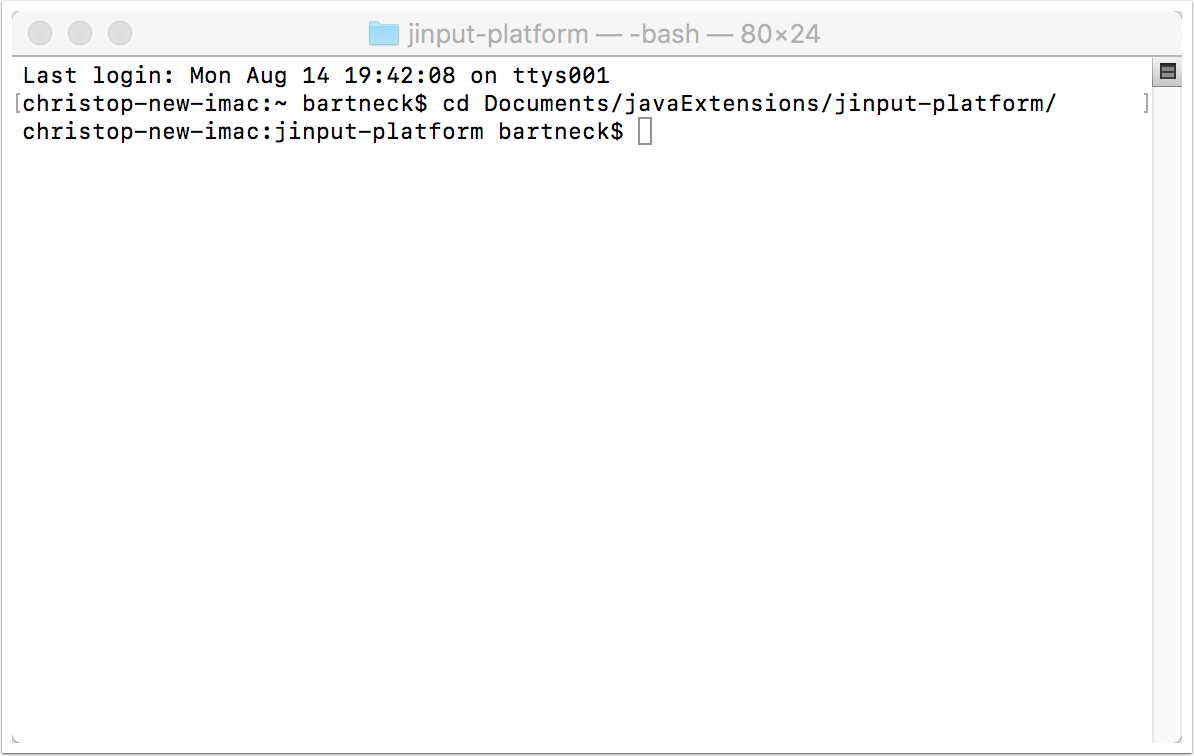
4. Open the Terminal application and change the directory to the jinput-platform folder you just created.
Use the cd command to move to the jinput-platform folder you just created. You can use the tab key to auto complete the names of the directories.
5. Extract the native OS X file
Type in the following command and press enter to execute it.
jar xf jinput-platform-2.0.7-natives-osx.jarUse the ls command to get the directory listing. You should see the new file libjinput-osx.jnilib

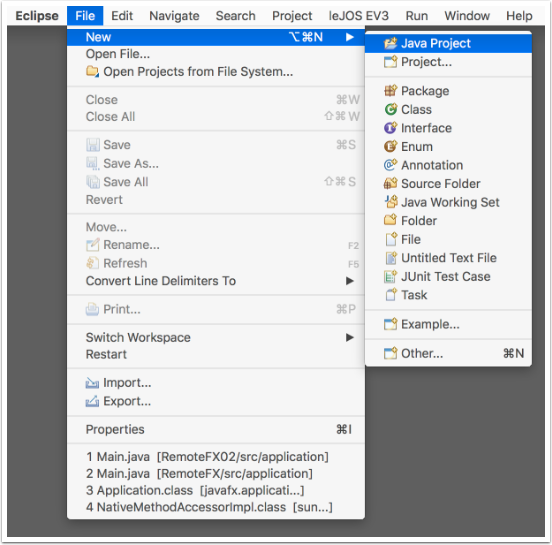
6. Create new Java project in Eclipse
Use the menu to start a new Java Project in Eclipse. Eclipse is an Integrated Development Environment (IDE) which is open source and available for free. You will need Java (version 8 or newer) to run Eclipse.
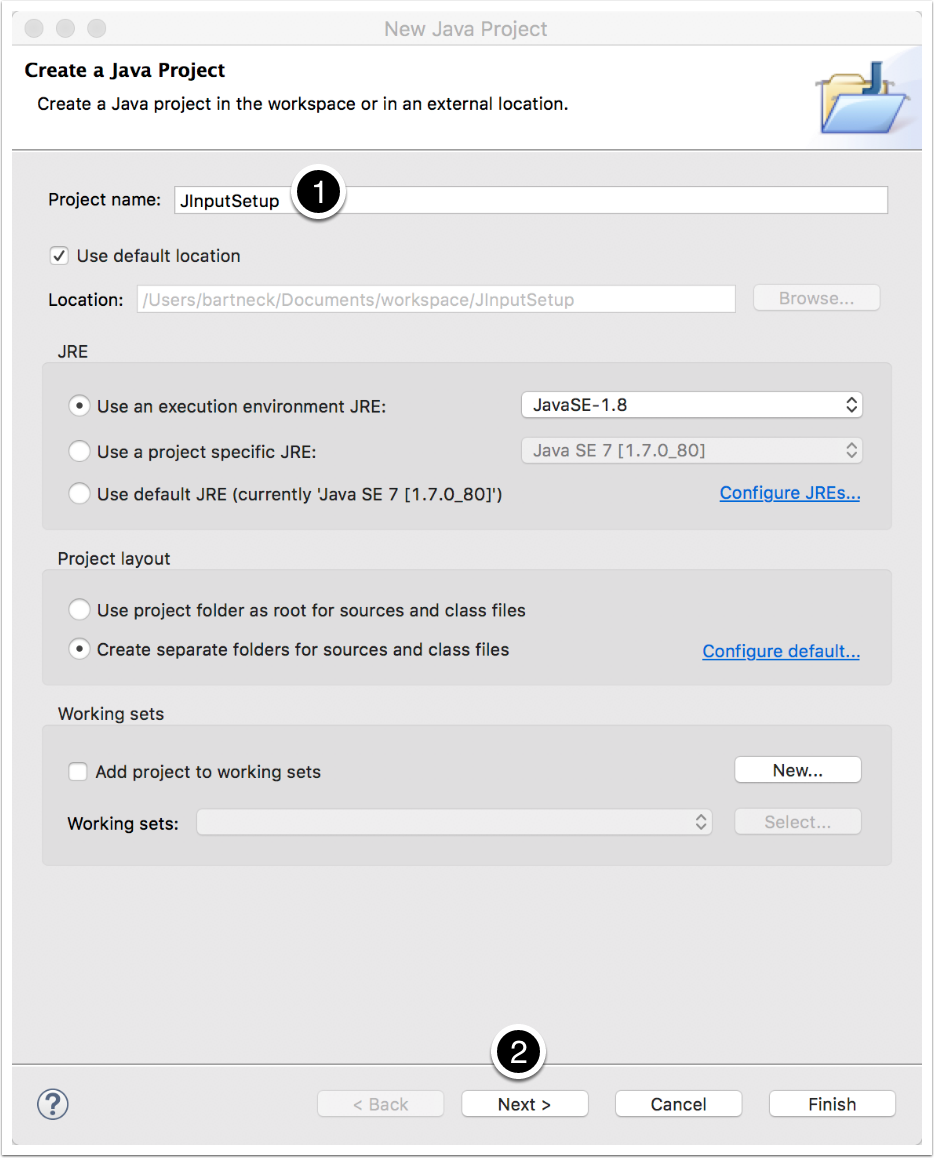
7. Name the project
Give the project a meaningful name. In this example we will use JInputSetup. Click on the “Next” button.
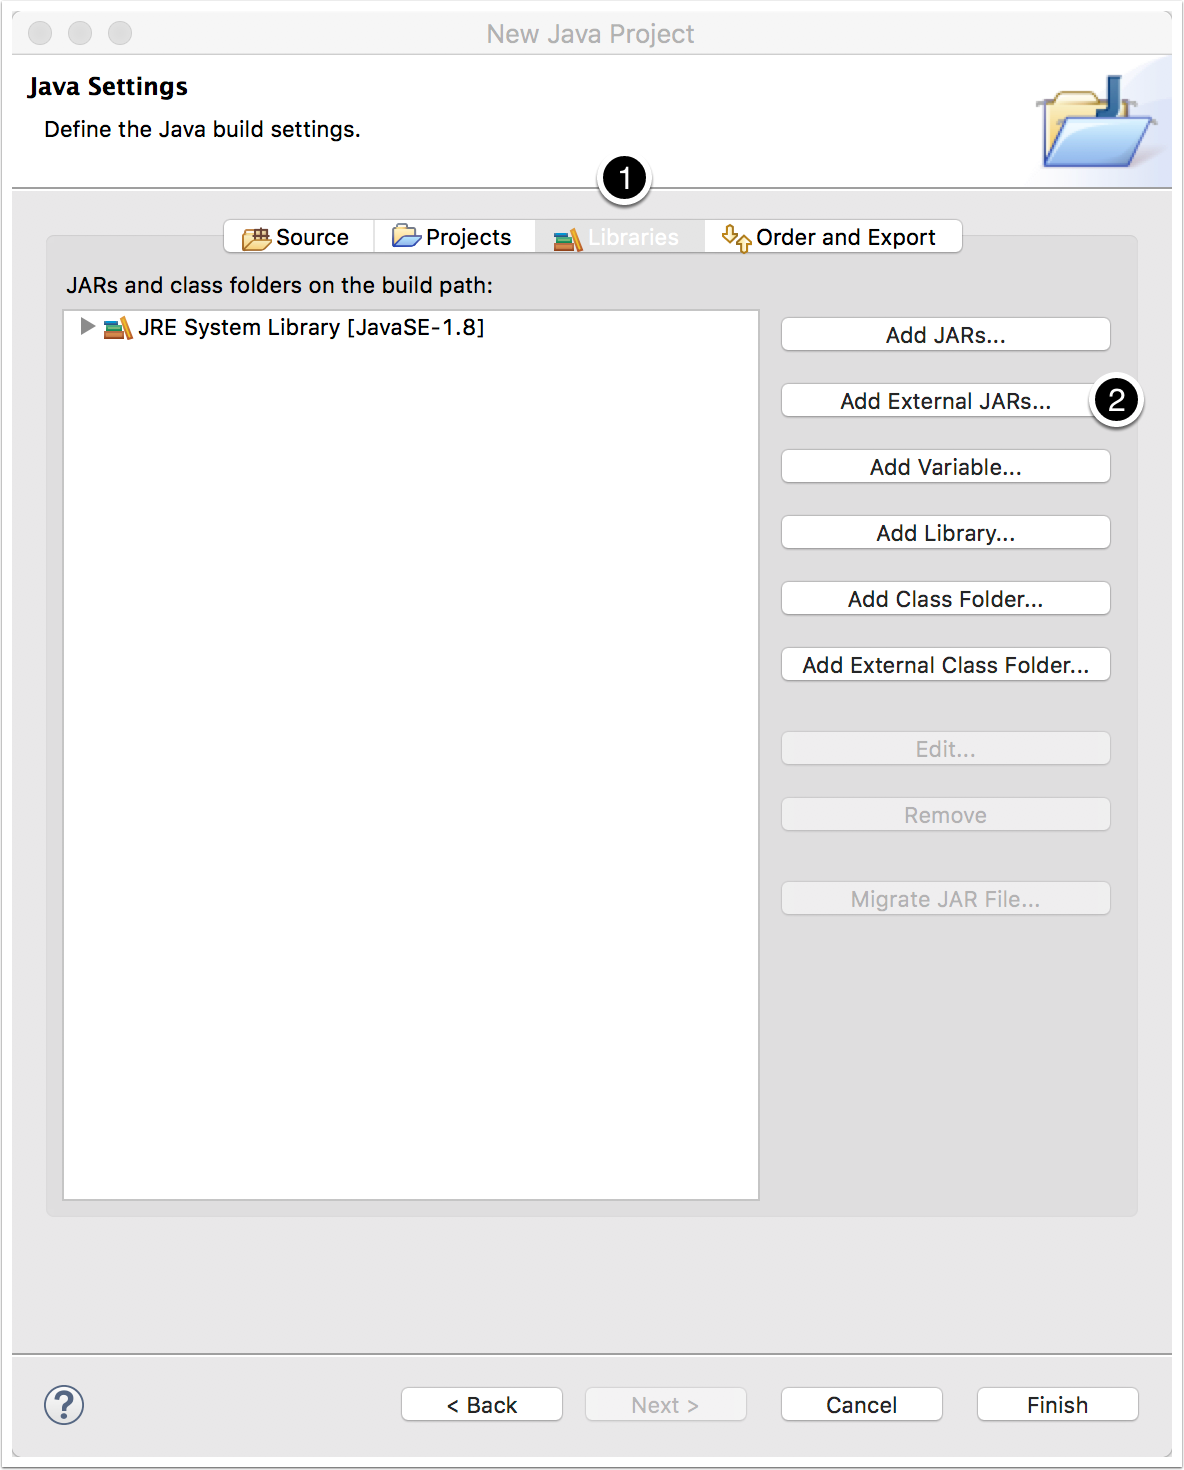
8. Add external JARs
Select the Libraries tab and then select “Add external JARs…” to integrate JInput into your new project.
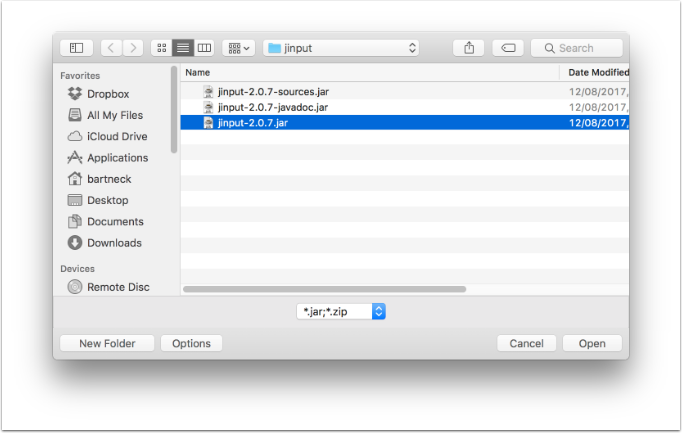
9. Select jinput.jar
Go to the directory in which you moved jinput.jar and select the file.
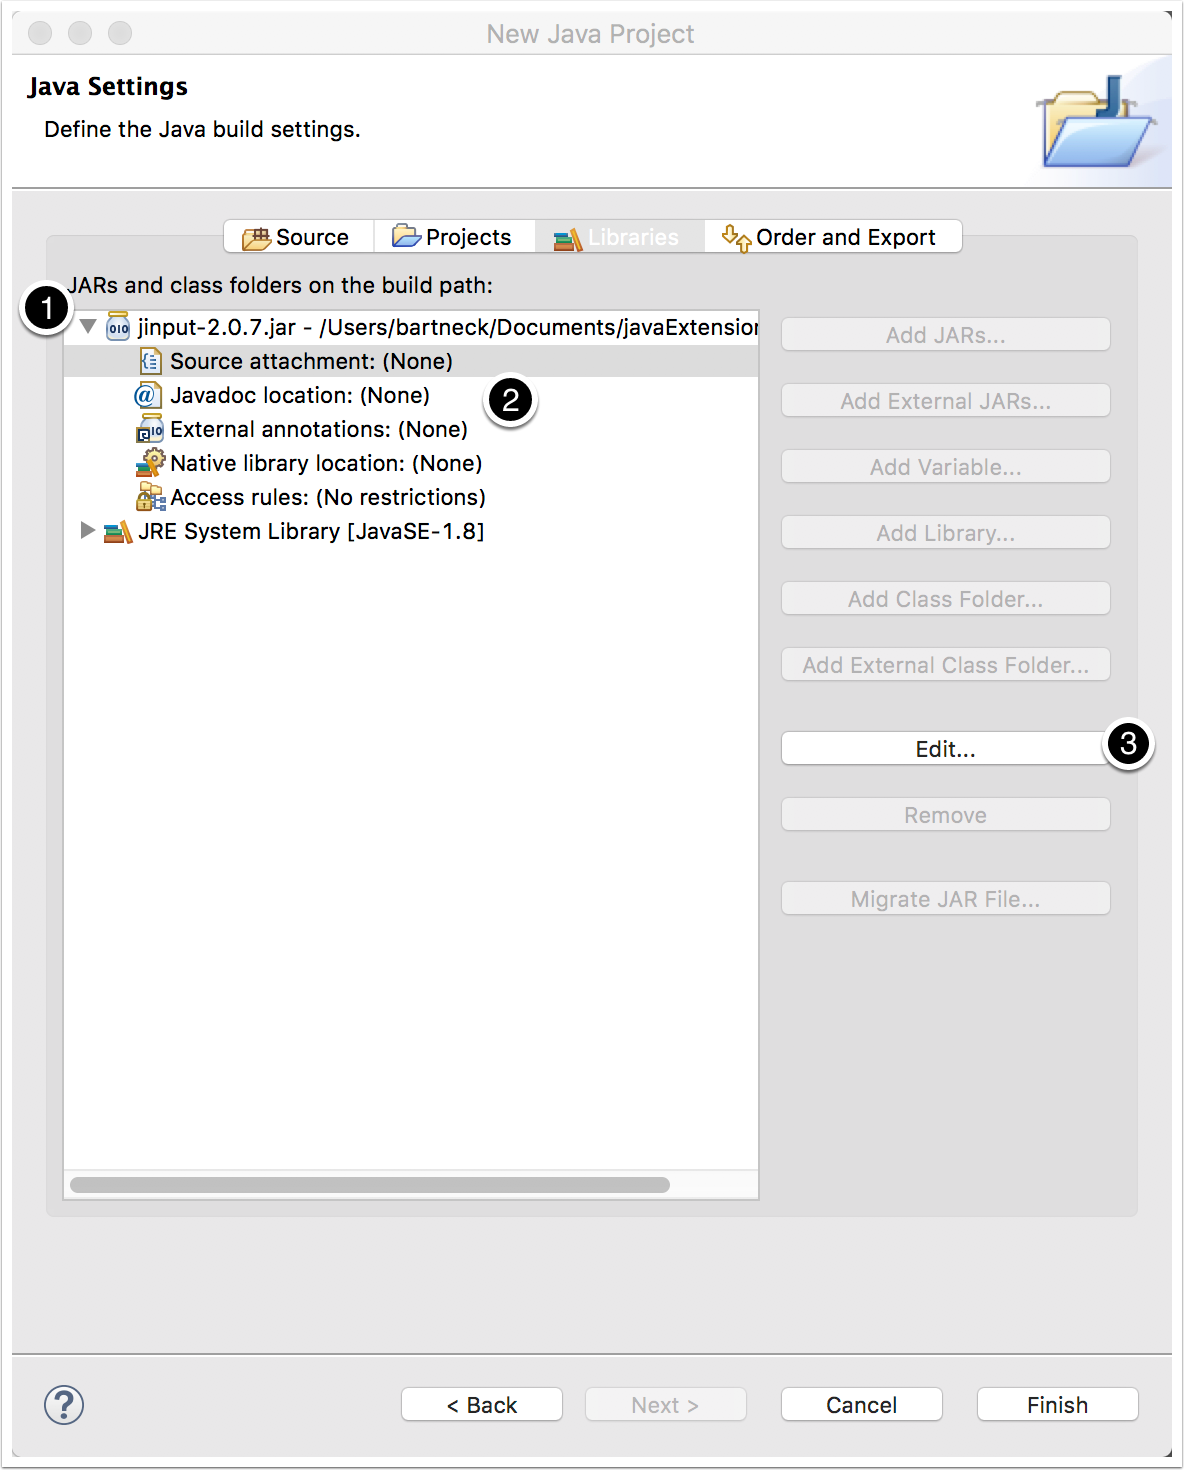
10. Configure the JAR file
Now we need to configure the JInput JAR library. First, use the little triangle to open the list. Then one after the other select “Source Attachment” and press the “Edit” button.
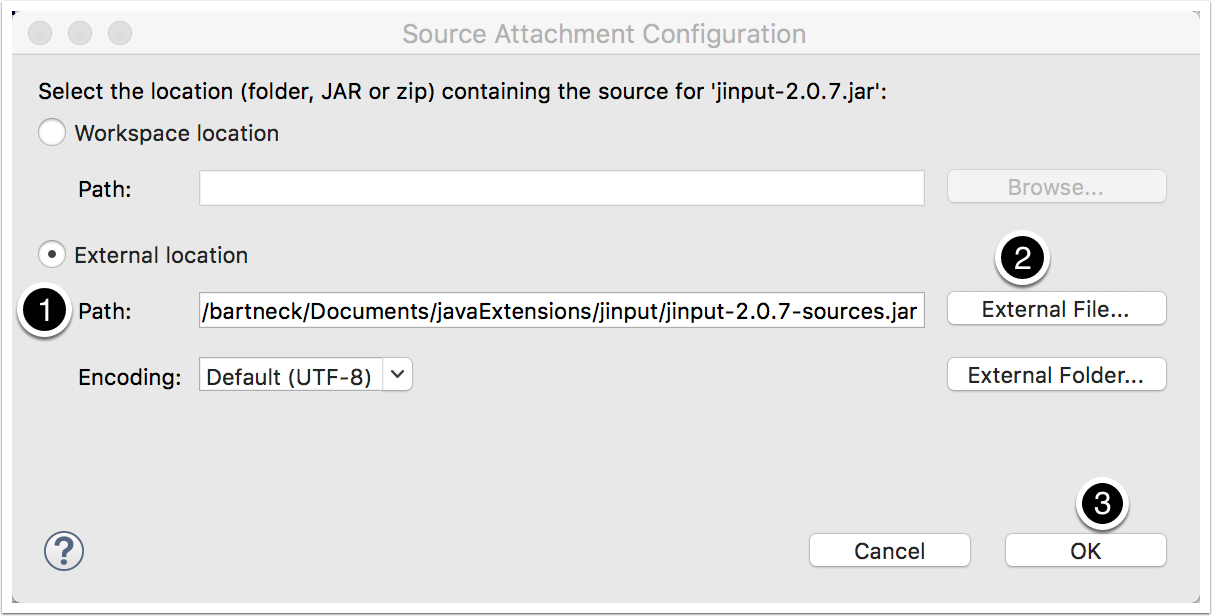
11. Select the sources JAR file
Select the sources JAR file from its external location and press “OK”. Link the Javadoc JAR file in the same way.
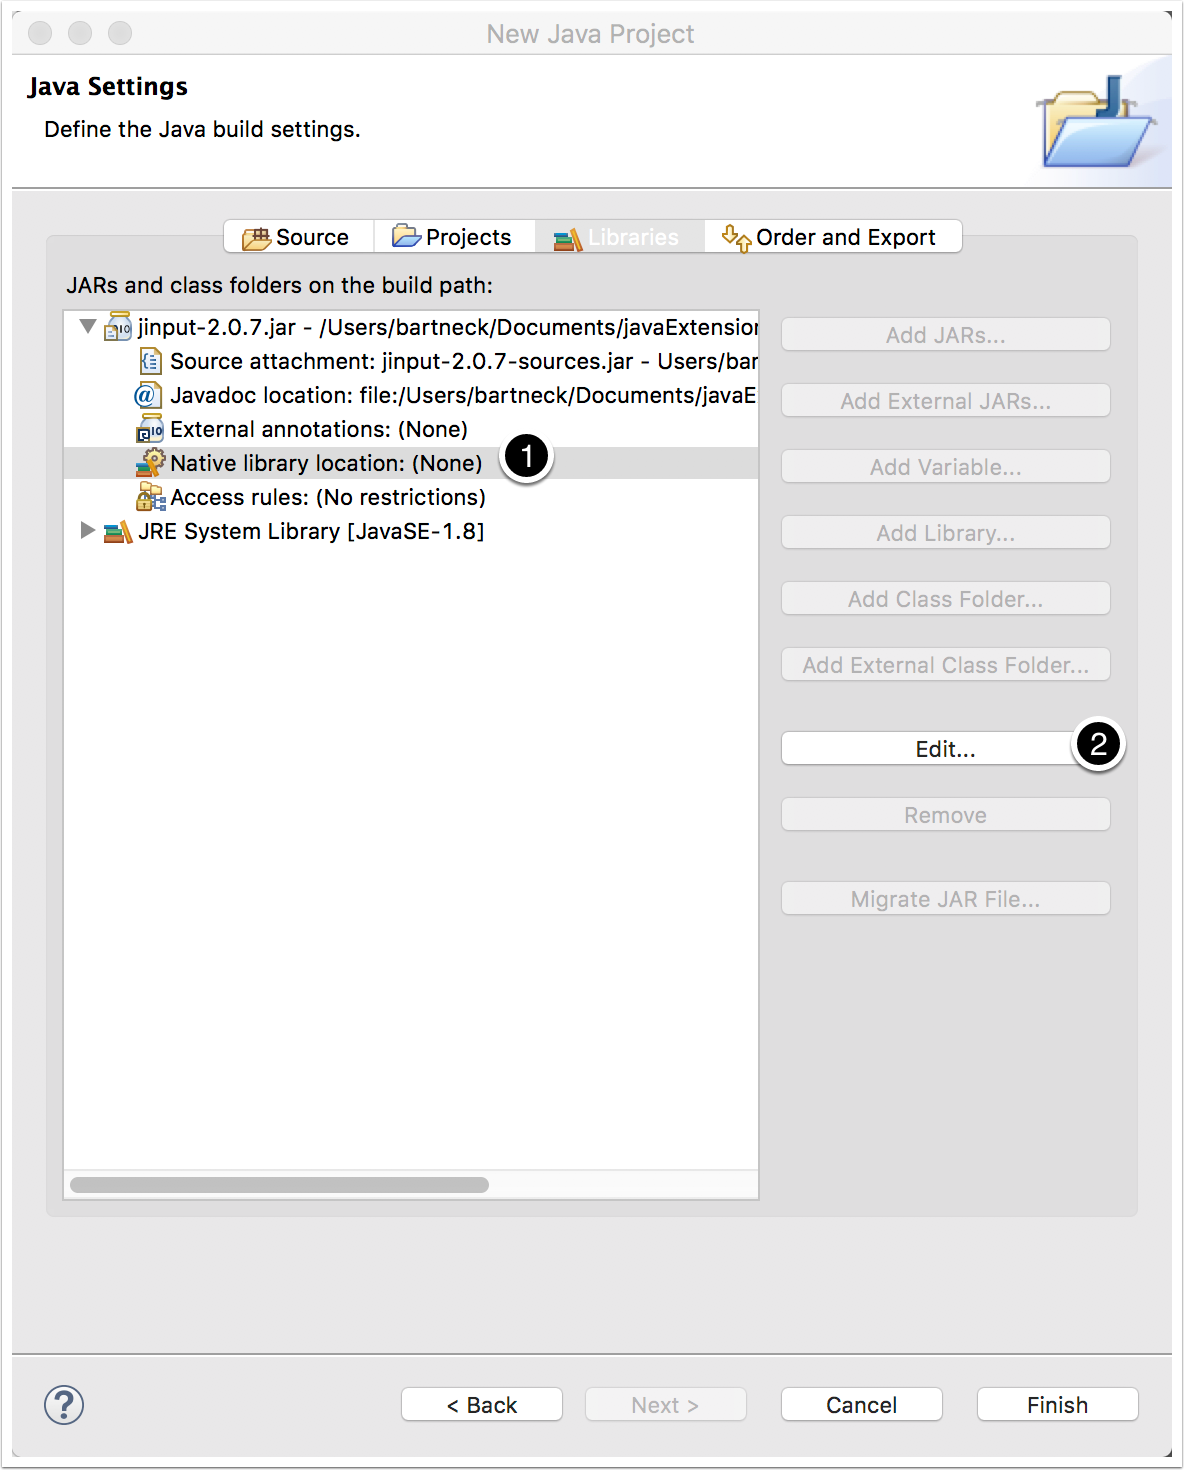
12. Link the native OS X file
Select “Native library location” and click on the “Edit…” button.
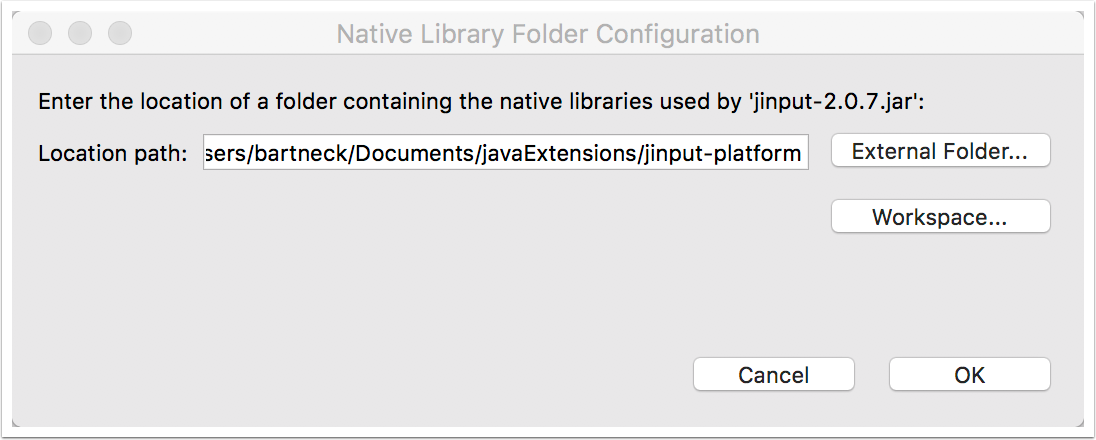
13. Enter the path to the folder that contains the libjinput-osx.jnilib file we extracted earlier
You need to select the folder that contain the libjinput-osx.jnilib file. Press “OK”.
14. Add jutils.jar
Add the jutils.jar in the same way as the previous JAR files. You do not need to link the javadoc or source JARs.
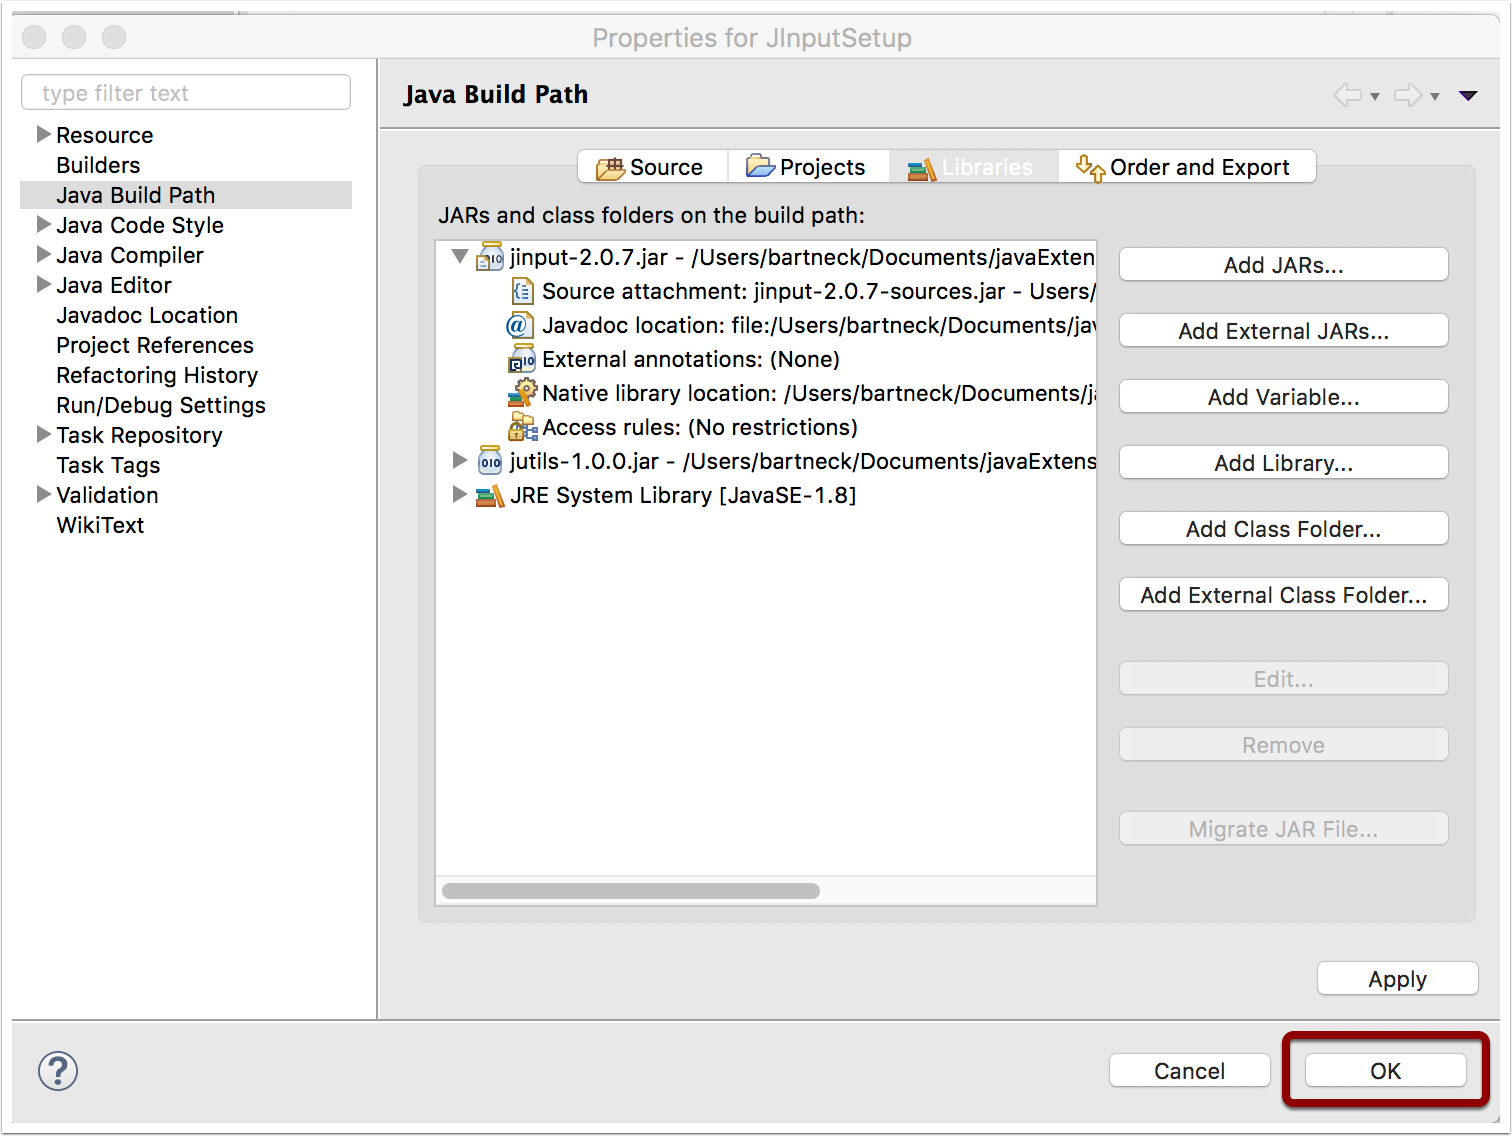
15. Check the configuration
Your libraries tab should look similar to this screenshot. You can now click on the “Finish” button.
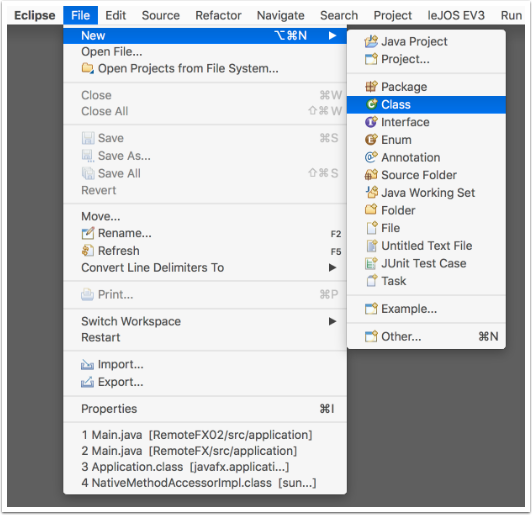
16. Create a new class
Use the menu to create a new Class.
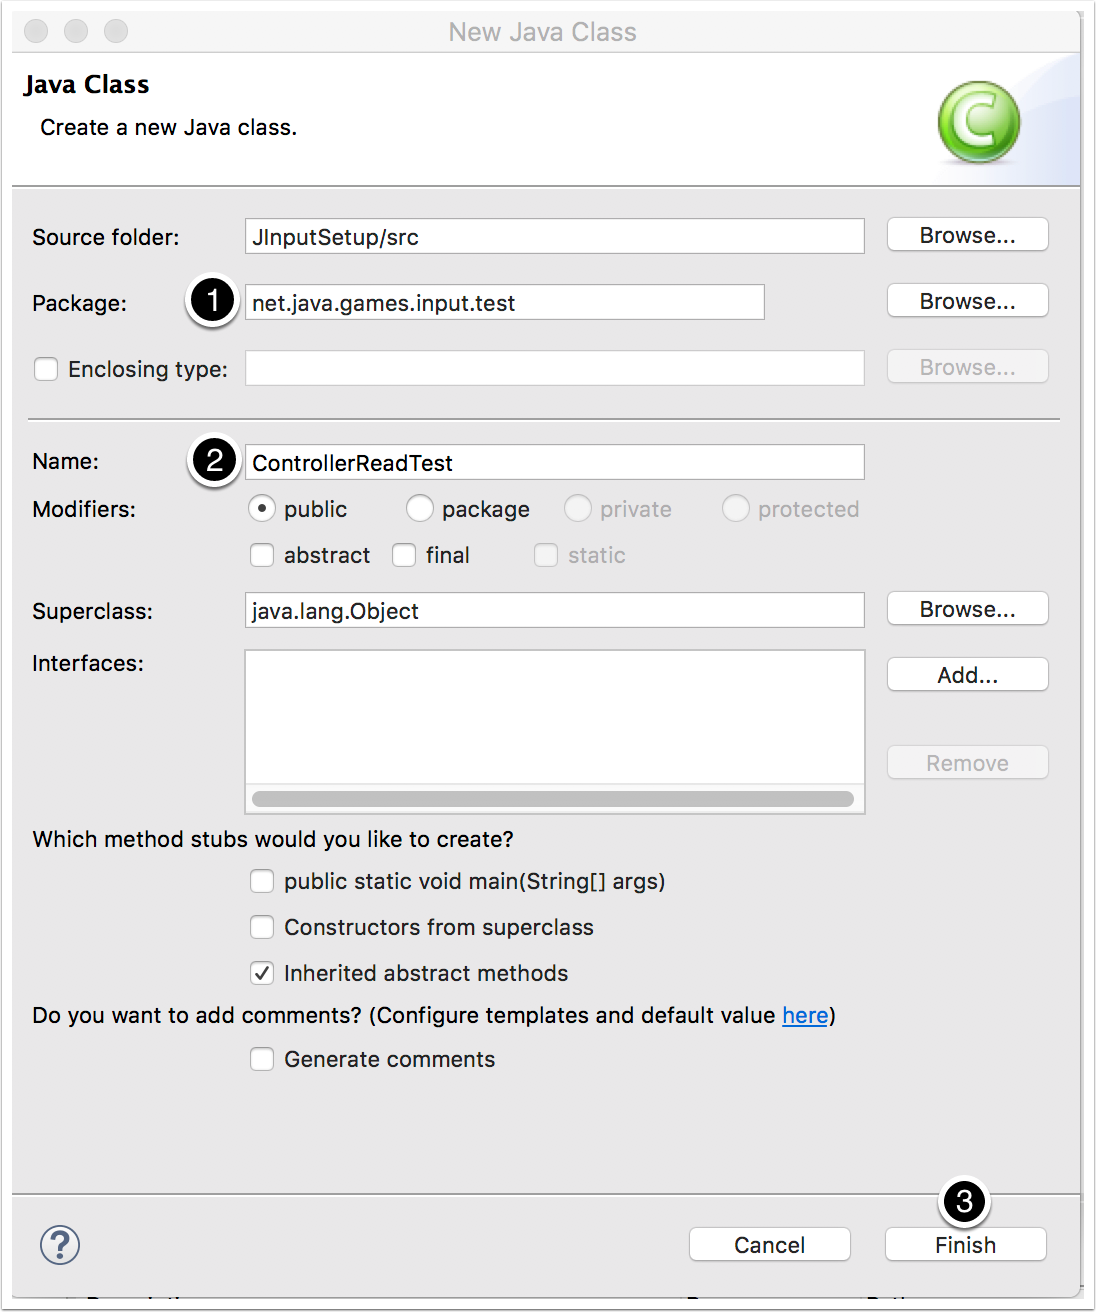
17. Configure the new class
We will be using using a test program called ControllerReadTest, so lets call the new class ControlleReadTest. For the package you can choose net.java.games.input.test.
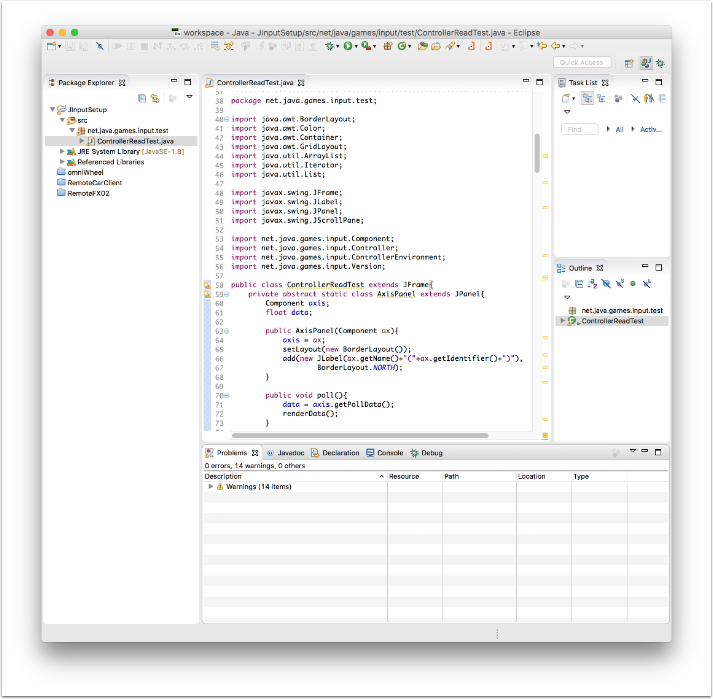
18. Copy the ControllerReadTest.java file
The original Github of JIput included a test program which seems to have been gone by now. Visit this web page instead and copy the code into your new class. Save the file. I am not entirely sure if this will work.
19. Run the program
Click on the “Run” icon or select Run from the menu to run the code. In the console you will receive some information about the found hardware such as:
Component count = 180
Component count = 180
Component count = 19
Component count = 8
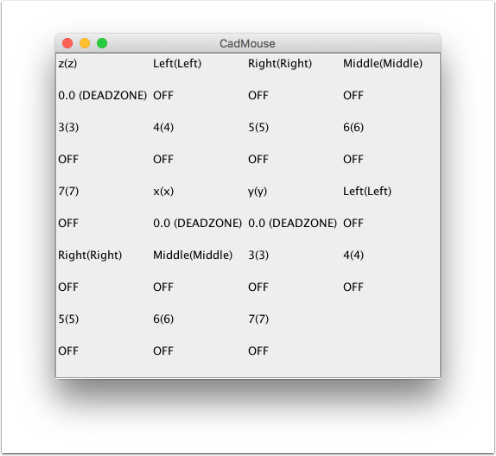
Component count = 172For each input device you will find a new windows that shows you the readings for all the variables associated with this input device, such as buttons clicked or coordinate. The Javadoc is also avaialble online.
One thought on “Tutorial on how to install and setup JInput on Mac OS X using Eclipse”
Comments are closed.