It has long been a dream of mine to build a remote controlled LEGO car. LEGO has many Technic cars in their program that use the Power Functions to remote control certain functions, such as opening doors or lifting an arm. Power Functions use infrared light for communication between the sender and the receiver. In the past, LEGO also had remote controlled cars that use radio frequencies, which is much better, since it does not require a line of sight and has a much further reach.
Recently, LEGO released the 4×4 Crawler and it really triggered something inside of me. I ordered the set, but when it arrived I never put it together. I started to build my own cars right away. I looked for inspiration on the internet and found many great off road cars, trial trucks and multi purpose car technology. In particular the work Pawel “Sariel” Kmiec. Check out his book “The Unofficial LEGO Technic Builder’s Guide” or visit his website. LPE Power also has some wonderful instructions on how to build real car technology with LEGO.
Conceptual Ideas
Speed, torque, weight, balance, clearance and grip are the key factors when designing an off road car. Your choice of motors, gears, wheels, and chassis all influence these factors. Four wheel drive is a must for off road cars. Differentials are a big no-no due to the slip. A wheel detached from the ground would spin freely, while the wheel still on the ground will receive not torque at all. I also do not believe that a suspension system is necessary for a LEGO off road vehicle. There are no passengers that require comfort and the big tires already absorb enough energy.
Motors and gears
LEGO has many motors in their program. The most recent Power Function Motors come in three sizes that vary in terms of rotation speed and torque. The higher the speed the lower the torque. You can find out about the exact characteristics in this web page. For the steering you might also consider using the new servo motor.
You can change the speed/torque ration through the usage of gears. Sariel is offering an excellent tutorial on gears. More importantly, you can build gear boxes to shift gears. This enables you to have a lot of torque when you go uphill and more speed when you go down the hill. Again, Sariel is offering instructions for a heavy duty gear shift. I tried other compact gear boxes, such as smooth three gear box, but they all failed under a lot of torque. Here is my extension of the slfroden’s original design. I used a linear actuator to switch the gears remotely and you can now use two motors on it. I left out the neutral gear to make it more compact. It is a nice design, but not suitable for off road vehicles:
Next, I expanded Sariel’s original design since I did not want to move the motors around. Moreover, I wanted to attach two motors directly onto the gear box without the need of extra gears. You can use a linear actuator attached to another motor to shift the gears through a remote control. Here is a video of the gear box:
First Model
So here is my super ambitious first model. It has two XL motors, a gear box that can be operated remotely, four wheel drive, lots of clearance. The battery pack is all the way in front, making it a good climber. I used the servo motor to steer the front wheels and the 8879 to remote control the servo.
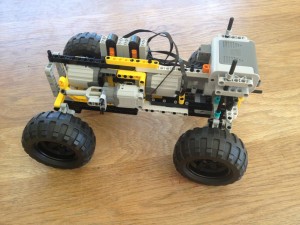
This was an complex design and in the end pretty useless. The steering was difficult to control. Most of all, it was slow. Turning the wheels from left to right took forever. Hitting the red stop button to bring the wheels back into the neutral position was often the fastest way. The gear shift also turned out to be problematic. Sometimes the gear was in a “in-between” state. The only solution would have been to glue the tooth wheels onto the axis to prevent them from changing their position on the axis.
Due to the lack of a suspension system, wheels did also occasionally lift from the ground, which resulted in a lack of grid. In conclusion, this is a far too complex design. There are numerous places where problems can occur. Back to the drawing board!
All wheel drive
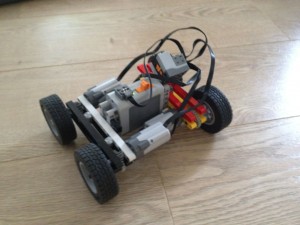
I radically changed my approach. Instead of building a steering system and a propulsion system separately, I took the “all wheel drive” approach. It works similar to a continuous track, often found in tanks. Electrical cars also use the idea. In essence, you attach each wheel to a dedicated motor. My first design, however, ended being extremely wide:
In the next design iteration I placed the motors along the main axis of the car. This was a much better climber since I could also place the battery pack right on top of the front axis:
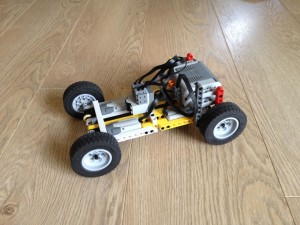
The main drawback with this design was the small clearance. The car could not drive over obstacles easily. So, in the third design, I put the motors up and used the angled bars to bring up the chassis. This was an even better climber but the M motors are very difficult to mount.
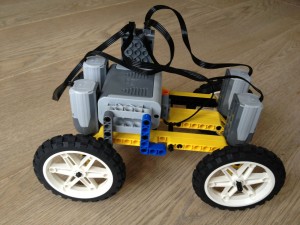
In the fourth iteration I used the L motors which gave me nice and compact car. It could easily get up slopes and drive over obstacles:
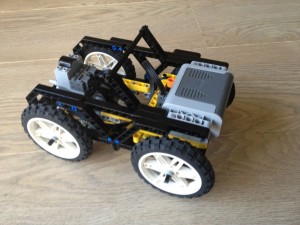
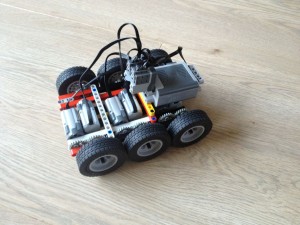
But why stop at 4WD when you can go 6WD? My 6×6 ATV vehicle used six motors. Worked perfectly fine, but was slower than the 4WD. The battery can simply not provide enough juice to run more than four motors simultaneously.
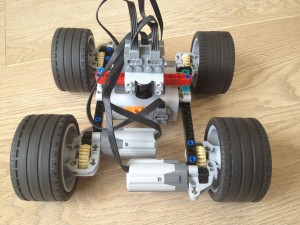
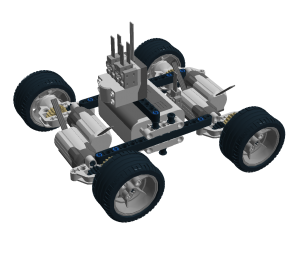
This six wheeler got pretty heavy and complex again, so I thought it was time for some minimalism. I tried to build a slightly geared down vehicle. The building instructions for this ultra light car are available and you may consider using the L motors instead to get more power. You could then use bigger wheels which does enable the car to drive upside down.
Here is a video of the car driving around:
This was a lightweight and working model, but due to lack of suspension, wheels could still be lifted from the ground. It is desirable to have as many wheels on the ground as possible. Individually suspended wheels, such as in the super car, have a tendency to be fragile and pendular suspension systems are a better option. The 4×4 Crawler uses such a system. The same effect can be achieved by using a joint in the middle of the car that allows it to twist along is main axis.
Final Design
My final design iteration included a joint in the middle of the car that allowed it too twist. You can download the instructions as LXF file for LDD. Check out the model at Rebrickable.
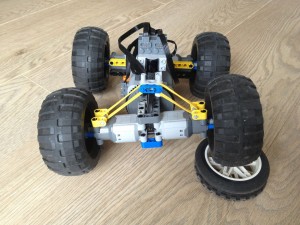
This design still did not have a good clearance, so I lifted the axis a little bit and got to my final design “RACE“:
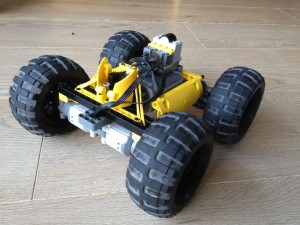
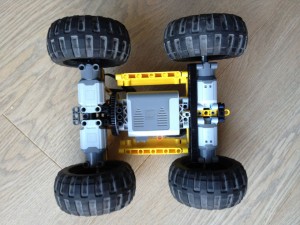
Each wheel is powered by one L motor. This design eliminates any loss of power due to tooth wheels. It is fast and at the same time it has enough torque to go up steep hills. The short wheel distance and the large wheels gives it the ability to climb over objects. Here is the car, named “RACE”, from the bottom view.
Here is a video of RACE in slow motion:
UPDATE:
I build a more robust and simpler version called RACE2 (how surprising). I added a roll over cage, bumpers in the front and the motors are now better attached to the chassis. Building instructions and more photos are available.
Tracks
After completing this RACE car, I had one week left to try out continuous tracks. The first thing I noticed was that the LEGO tracks are extremely smooth and have very little grip. They could hardly get up and obstacle or hill. My first attempt at improving the tank was to rise its front wheels:
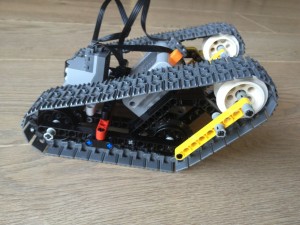
This design was still a failure, since the front had now a high level of attack, but still no grip at all. In an act of desperation I decided to “spike” my tracks by adding 3/4 Pins into it. With this small change, the tracks could bite into every little crack or edge. Finally it could get up anywhere, although I am pretty certain to ruin all the pins in the process. The building instructions are available for LDD.
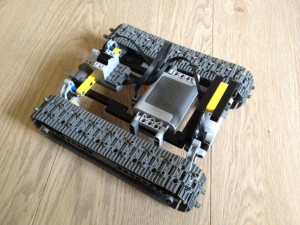
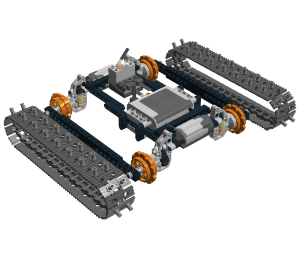
Notice the two L motors and the low position of the battery pack. Only very few pieces were necessary to build this model. I used the Steering Portal Axle to give the vehicle a better clearance. Here is a video of Mr Plow in action:
Results
I spend two months building the fast RACE All Wheel Drive Off Roader and one week to build Mr. Plow. Guess which one won the Off Road Challenge today? MR PLOW! RACE shared the second price with another vehicle. It all came down to a 3 centimeters that another vehicle was able to climb higher on the Muddy Hill Trial. Here is the video of the event:

I started basically at your first model and simply made it good enough to work. I also tried the Servo motor, but it does not have enough torque. I used suspension from Nico71’s Trial Crawler and Sariel’s two speed gearbox exactly as he designed it, the gears do not need glue to stay in place. The 88000 battery box is light enough to simply clip on the side.
Thanks for the great post! I have tried building the Race 2 and the wheels are spinning in opposite direction. Could you give some insights as to why is this happening?
Thanks
Naveen
On your IR remote there are two dip switches. Use them to set the direction.
You may think of use power open source hardware and software to develop robot but still use LEGO Mindstorm EV3. Now, a Good News that some hacker develop a shield for Beaglebone directly replace Lego mindstorm of EV3 series controllers. Recently they released this project on Kickstarter, there are more than 10 days coming to an end. Who love open source hardware and robotics should be like this product.
https://www.kickstarter.com/projects/fatcatlab/evb-replace-the-brain-of-your-lego-ev3-with-beagle?ref=nav_search
I was curious if you are only using once receiver on your final “race” design? I am getting parts in the mail and on;y have one remote so wondered if you can stack two motors on one side of the IR then two on the other..making 2 motors move together with one control switch?
Yes, it is possible to put two motors onto one output of the IR receiver.
Hello, I just bought power functions pieces, but I still missing construction parts especially to build steering and (possibly) suspencions. Where are you taking these special pieces? Could you please recoment a shop? or a lego set which is a good start for small simple remote controlled car? … Thanks. W
Bricklink might do the job.
I Only have 2 L motors and 2 M motors, the M motors doesn’t fit. dode anyone has a solution?
Hello, could anybody help me to find the “joint” part placed to the middle of RACE(2) car? I do not know how to find it on blicklink or another place. Because I do not know the proper name. Any help is appreciated. Thanks. W
Answer my own previous question about “middle joint” part.
At the end of lego instructions is list of parts… where is “TURNTABLE 4.85 – Black,Medium Stone Grey”
BrickLink part id: 48452cx1
Nice description: http://rebrickable.com/parts/50163/technic-turntable-large-type-2+-complete-assembly-with-black-outside-gear-section-2656-teeth
I just build RACE2 and that is a BEAST, great!
But I have a little problem to controll it. Are you using some “custom” controler to control 4WD machines? Could you please gave us a build instruction? or link? Thanks a lot!
My son and I want to sincerely thank you for building such amazing models and making these plans available at no cost. We want to try to build all of them or at least as many as we can. So far the Race2 has been a huge success but now we’re getting in all the various different PowerFunctions motors along with more technic parts. As we become more knowledgeable about what we’re doing we would like to bring this into our local Cub Scout Pack – which I happen to be the Cub Scout Master too. Just curious by do have anything to do with Augmented Reality in your work? If so we ought to talk some time. I work for Cisco Systems (Information Security – Education and Awareness) and I have dabbled in the AR and Augmented Learning space. Plus I own a small start-up that’s involved in software that I’m gearing towards the AR space.
These creations are amazing, thanks! I also tried making a off-road car with buggy motors and a M motor for steering, and it worked out well.